previous page

Transforming Fairy Tales
Lesson 8. Putting the pages together


next page


Lesson 1. Transforming

Putting all of our technology skills to use.
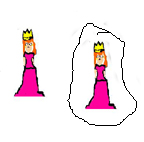
Open a Drawing (DR) document
Save as Student name/Fairytale/page1
Open the Painting document where you have saved the background and pasted your characters.
Now the students are ready for the final copy and paste.


Lesson 5. Creating a character template


Lesson 2. What is a fairy tale?
What are the characteristics?

Lasso a character. Copy the image from the character document (PT) and then paste it onto the background page (PT). Now, select the entire page, copy and paste onto the new drawing document.


Lesson 6. Transforming characters


Lesson 3. Writing our fairy tales
How can we transform a tale?

Now, copy and paste the text for this page. The advantage of working in a drawing (DR) document is that it allows you to move each object (text and painting) around the page independently.

Save as "Student name/Fairytale/page1"
Once the images and writing are moved to this page, a border can be created.
Once all of the pages were pasted and edited a final time, they were printed. We were fortunate to have binding materials from Lintor publishing which allowed us to put the final fairy tales into a finished format.


Lesson 7.Finding backgrounds on the Internet.


Lesson 4. Editing our tales


Index


9. Helpful Web sites


See our fairy tales


Lesson 8. Putting the pages together