 Subject: Art/ Writing/Technology Subject: Art/ Writing/Technology
Grade Level: Grade 5 and up
Materials: LCD projector and movie screen; laptop computers and computer lab; digital movie camera and camera; iMovie, Microsoft Word, and PowerPoint software; celluclay; coat hangers, assorted fabrics and decorative accesories; scissors; twist ties; brushes and acrylic paints; fabric tac
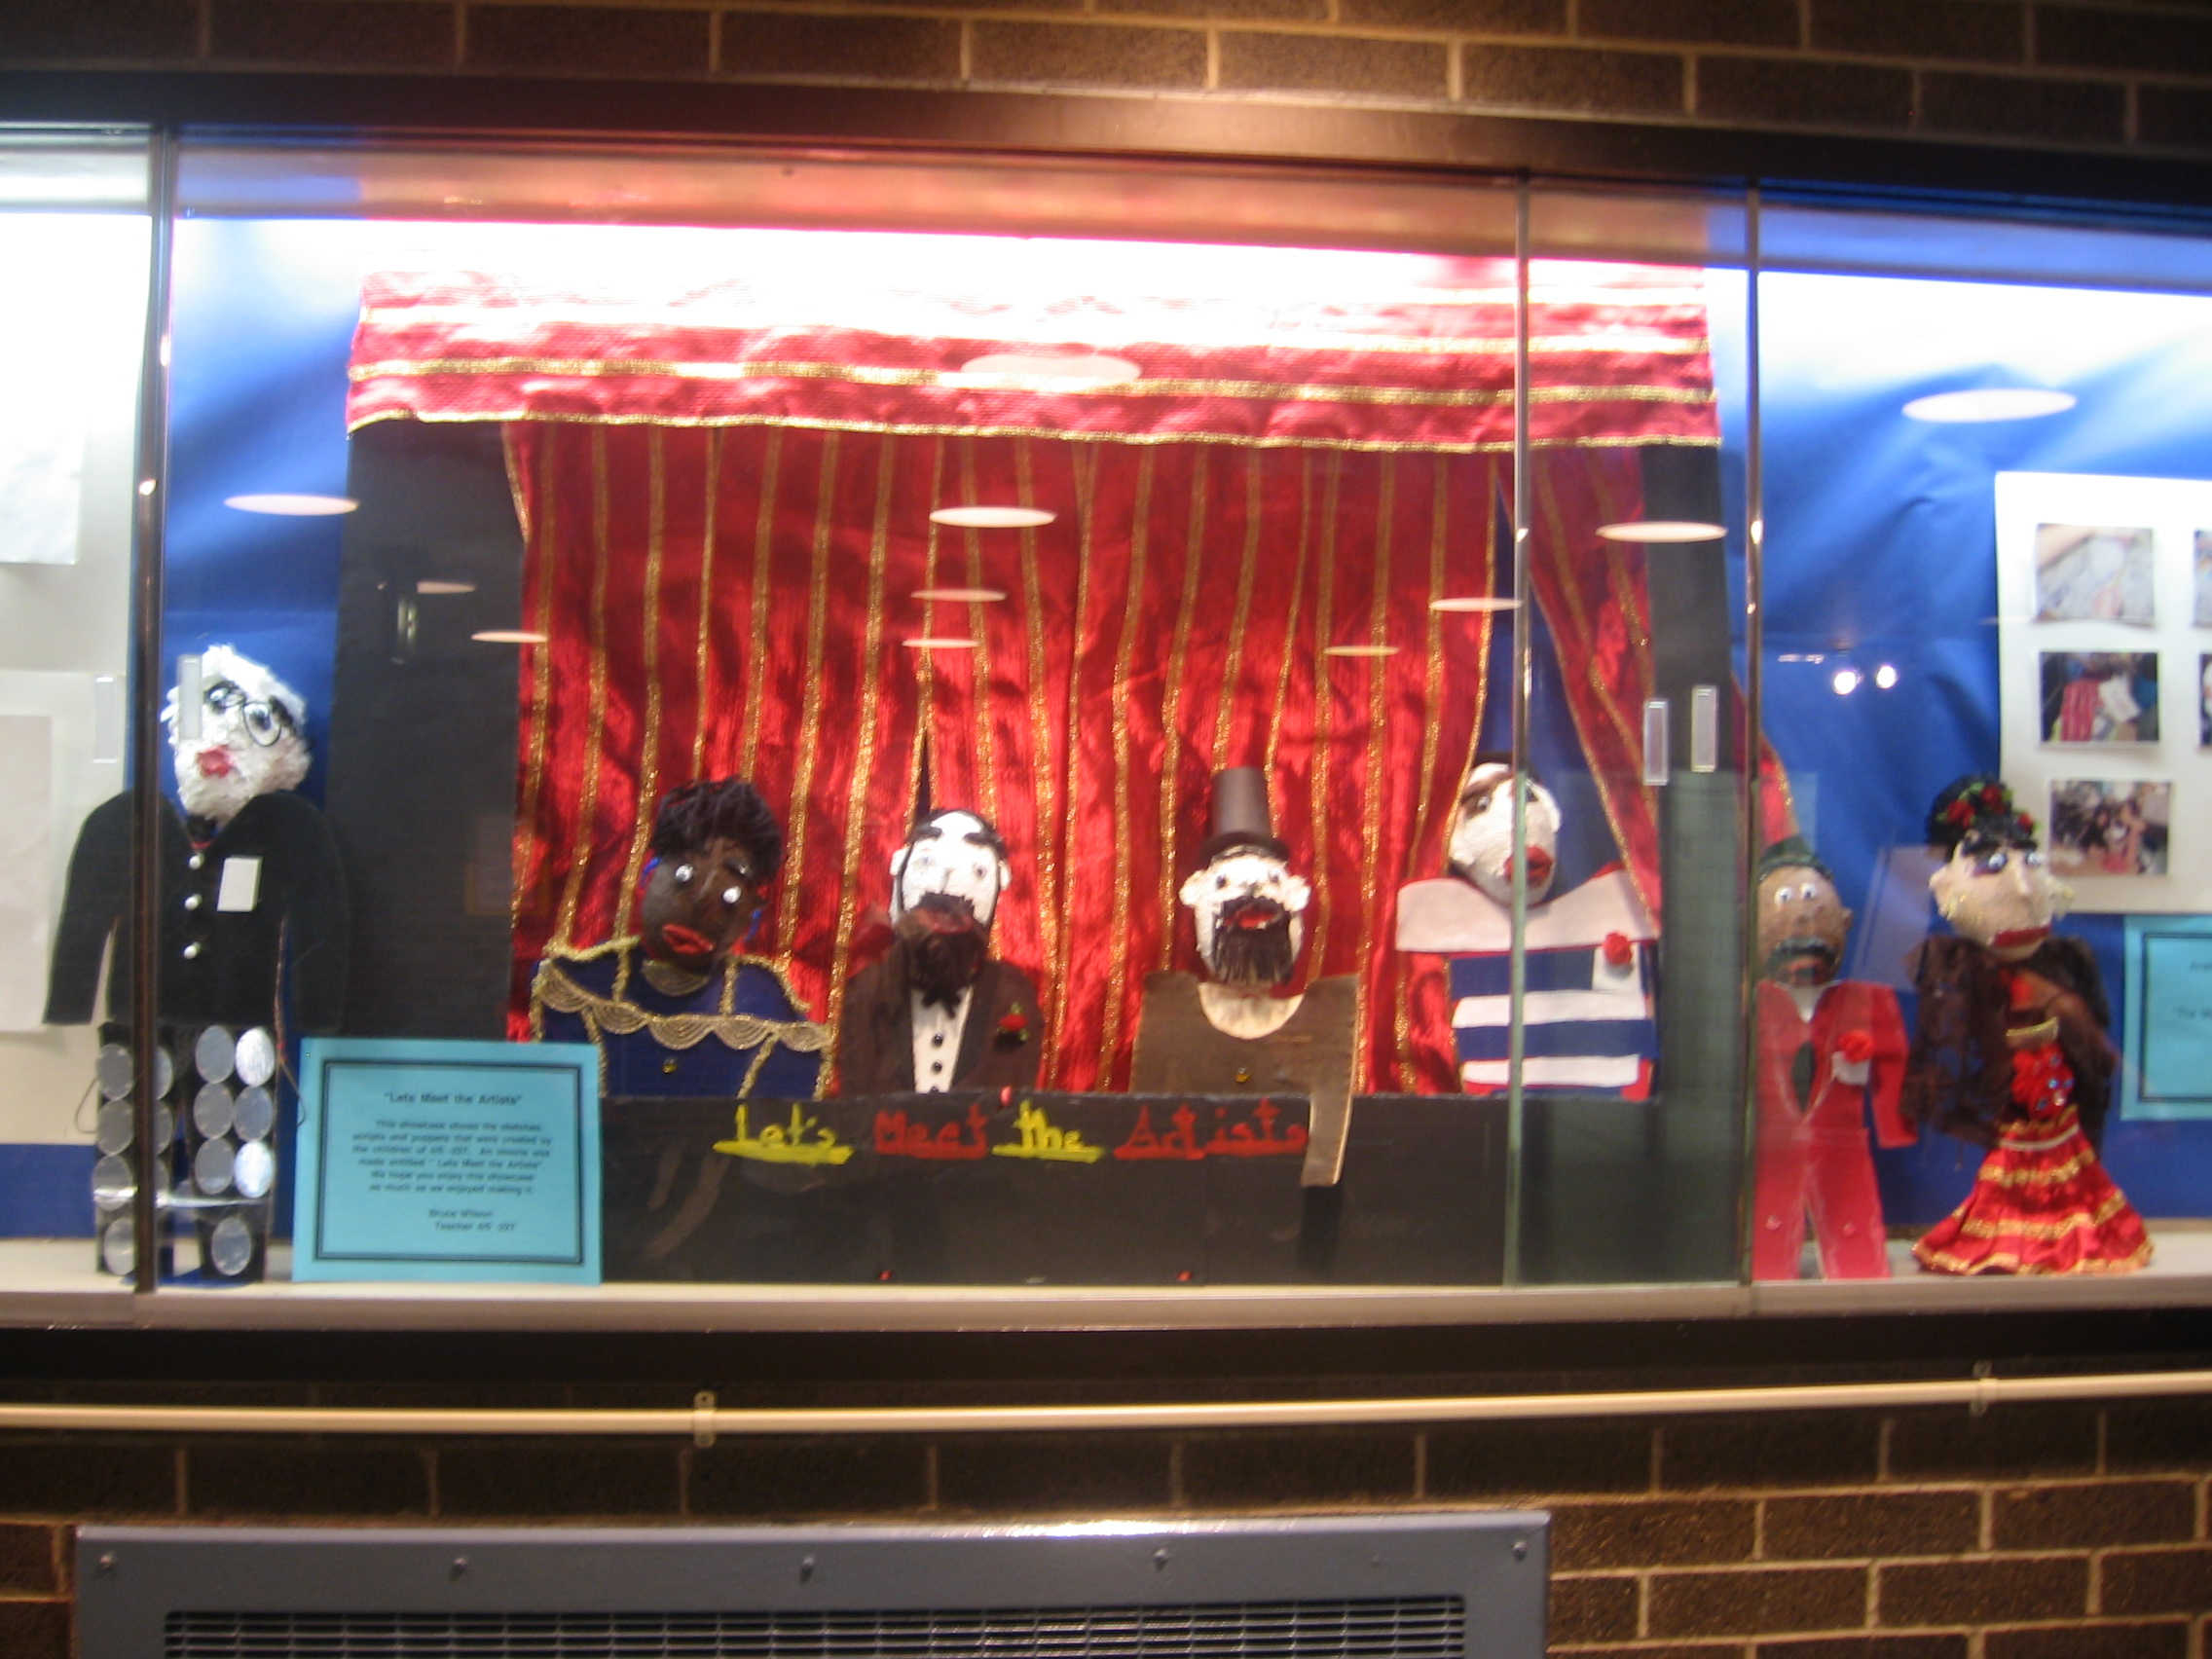
About: The students work cooperatively in pairs or small groups and learn about different art techniques as well as the different periods of art. They conduct research on a specific artist and write a script incorporating what they have learned. The students create puppets using celluclay and present a puppet show. They are actively involved in a movie project and learn about the many different jobs involved in making a film.
The culminating activity of this unit is a puppet show based on the scripts the students wrote from their research. They use the puppets that they made and the show is filmed and made into an iMovie.
This unit enables the children to learn about different art forms and appreciate the work of different artists. It allows them to express their creativity through art, writing, and performing with puppets.
This unit was used with a special education fifth grade class (12:1:1: class) but can easily be adapted to a regular upper grade class. Grouping and the number of styles covered will depend on the amount of students in class. Limit the number of styles studied to five. I had a paraprofessional and another parent assist in keeping the students on task during the filming of the movie. The students were responsible for working together and producing the end product with support from the teacher.
| Students will understand the characteristics of the different styles of art. |
| Students will exercise their writing abilities by producing a script. |
| Students will research their artist and his/her style of art through the suggested websites. |
| Students will work cooperatively in pairs or groups. |
| Students will produce a PowerPoint presentation. |
| Students will perform a puppet show. |
| Students will appreciate the many different jobs that go into movie making. |
|
|
|
| N.Y.S. ELA STANDARD Students read, write, listen, and speak for information and understanding. As listeners and readers, students collect data, facts, and ideas; discover relationships, concepts, and generalizations; and use knowledge generated from oral, written, and electronically produced texts. As speakers and writers, they use oral and written language to acquire, interpret, apply, and transmit information. |
| Elementary school |
| Language Arts/Writing |
| New York State Visual Arts Standard 3: Students respond critically to a variety of works in the arts, connecting the individual work to other works and to other aspects of human endeavor and thought. |
| Elementary school |
| Visual Arts |
| National Curriculum Technology Standards: Students use technology tools for individual and collaborative writing, communication, and publishing activities to create knowledge products for audiences inside and outside the classroom. |
| Elementary school |
| Technology |
| NYC Standards: Tools and techniques for working with others: Students work with others to complete a task. |
| Elementary School |
| Applied Learning |
|
|
|
|
|
|
|
|
|
|
|
|
|
|
|
|
|
|
|
|
|
|
|
|
|
| Day 1: The Different Styles of Art |
| Students will understand the characteristics of the different styles of art. |
|
|
|
|
|
| Computer with Internet access |
|
|
|
|
| The teacher talks about the different styles of art. Using the smartboard or computer hooked up to an LCD projector, the class visits one of the websites that illustrates the different styles. Cubism, pointillism, realism, folk art, and pop art are defined, and there is a discussion of the artists that use these styles. I used Pablo Picasso (cubism), George Seurat (pointillism), John Aububon (realism), Clementine Hunter (folk art), and Andy Warhol (pop art). Show the children examples of their art works. |
| In the computer lab or in the classroom, let the children explore the different websites so they can see what artists and styles interest them. Give them a list of artists that represent each of the styles. Assign the children in pairs or groups a specific style and artist. Let them go on the different websites to get additional information on the artist and style they were assigned. (The text reader feature can be turned on to help assist in reading material.) |
| The children write reports about their artists life and style of art. They also copy art that represents their artist and style. Give a short lesson on PowerPoint if they don't already know how to use it. The children work together to create a PowerPoint presentation that can be used as a narrative in the iMovie. The PowerPoint can be projected onto a screen that will be part of the puppet show. My screen was below the stage of the puppet theater so it was easy to pan up to the puppets when filming the show. |
|
|
|
|
|
|
|
|
| Students visit these sites on their computers at home. |
|
| Students present copies of paintings depicting the style they studied. They show the class to see if they can identify the style. |
|
| Working in pairs or in small groups, the children write a script for a puppet show. |
|
|
|
|
|
|
| Computers with word processing software |
|
|
|
| The student were told that they will use their information on their artist and style to incorporate into a puppet show. They are told they will be writing a puppet show. The storyline is about a reporter traveling back in time to visit each of the artists. What questions would you have the reporter ask each artist? The questions must educate as well as entertain the audience. The children are in groups figuring out what questions they would like to ask. They decide which questions will be used in the script. They look at a checklist to see if their questions fit the criteria. |
|
|
|
|
|
|
|
|
|
|
| The students look at a checklist to see if their script is acceptable. |
|
| The children will exercise their creativeness in making puppets out of celluclay, and an instant paper mache'. |
|
|
|
|
|
| Celluclay, assorted colors of acrylic paint, styrofoam eggs, assorted samples of materials (felt, silk, nylon, etc.), metal coat hangers, accessories (buttons, sequins, feathers, etc.) wiggle eyes, yarn, pipe cleaners, sculpting tools, sketching pencils, craypas |
| Materials for the puppets can be obtained by going to the website http://mfta.org. This organization gave me a abundance of materials for my puppets. Located in Long Island City, Materials for the Arts is an organization that provides materials that can be used for art projects. By having your school register with this organization, you can obtain some nice art materials. It is hit or miss when you visit, as things are always being donated. |
|
|
|
| Each group breaks up into pairs. One pair will work on the head of the puppet. Another pair will work on the costume. The third pair assembles the puppet. |
| It is important that the teacher model each step before the students attempt it. First mix the celluclay, then take the 6"x4" styrofoam eggs and cover them with celluclay. Let the student look at photo of the artist so they can get an idea of how they want to make him/her look. Allow at least 90 minutes for the clay to dry. Next, the students take the acrylic paints and paint the face. They can use wiggle eyes or buttons for the eyes, and can use yarn, cotton, pipe cleaners, or addtional celluclay to mold into hair. |
| The second group of children has been sketching costumes while the other chlldren were making the heads. They can look at photos of their artists to get an idea of what kind of costume they want their puppet to wear. After they make the sketches, they are ready to make the frame of the body. The body of the puppet will be made from a bent coat hanger. (You might want to have an adult assisting in this part.) Take the coat hanger and straighten out the top hook. Bend the hanger in half so it will stand up on its own. |
| Making the costume is done in several steps. First, let the chlldren take chalk to outline the fabric. It should not be too much wider than the bent hanger. They then can cut it out. They decorate the costume with an assortment of materials provided. Fabric tac can be used to adhere decorations to the material. |
| The children can use a variety of materials to make their costumes. Visiting M.F.T.A. allows you to get finer materials like rayon, silk, cotton, etc. Many designers and clothing companies will donate surplus material. They also donate accessories such as buttons, sequins, etc. These are great materials to make puppets with. You can stock up for other projects as well. |
| Attaching the costumes to the coat hanger is done by taking a hole puncher and making holes on the four corners of the costume. Twist ties can be used to fasten the costume to the hanger. Decorative items added to the costume can be used to conceal the twist ties. |
| These puppets are more like talking mannequins. They are not extremely mobile. The mouths or limbs do not move, so they are decorative puppets. They are fragile, so they must move with care. |
|
|
|
|
| Checklist for making puppets |
|
| Day 4: Exploring Art Styles |
| The student will create an art work that depicts the style that they studied. |
|
|
|
|
|
| Acrylic paint, brushes, cray pas, crayons, colored pencils |
|
|
|
|
| In this lesson, the children show what they learned about the style of art they studied through a work of art they create. The teacher can have each group explore a specific style. For example, with pop art the students think about the objects that represent 2007. They might give answers such as plasma televisions, iPods, x-boxes. Have the students draw these items using a variety of different mediums and materials. These art works can later be used as props and background scenery for the puppet show. Another group might choose naturalism. Students can draw pictures of their favorite animal in the wild or of favorite pets. For pointillism, students try to make an object using a series of dots. They can use markers to make the dots. For cubism, pre-cut different shapes and let them make a pictures using shapes. For folk art. have them draw a scene depicting something that represents their community or family. They could show their family eating a meal, or a parade in their community. Let them use a variety of materials to make their picture three dimensional. |
|
|
|
|
|
|
|
|
|
|
| Hold up the children's artwork and let them guess what style it represents. Let them compare their work to the artist's work. Using the definition, ask them if the work represent that style. Teach them that there are short cuts to memorizing theses styles: cube=cubism, nature=naturalism, point=pointillism, etc. |
|
| The students will understand the different jobs that are required to make a film. |
| The student will learn how to manipulate their puppet. |
| The student will learn to use their voice to project dialogue, convey emotion, etc. |
|
|
|
| Digital movie camera, mini-DV cassette, tripod. an adjustable floor lamp, puppet theater, scenery |
|
|
|
|
| The students perform their puppet show using a variety of multimedia. First, assign different jobs. Show some of the students how to work the digital movie camera. Another group will work the laptop with the slideshow. Another will read the dialogue or move the puppets. You will also need students to be in charge of moving and setting up equipment and changing scenery. |
|
|
|
|
|
|
|
|
|
|
| The movie can be played for other classes. A survey can be given out to see if it was a success. |
|
|

Bruce Wilson
Bruce.Wilson46@gmail.com
Public School 112
2505 37th Ave
Long Island City, NY 11101
Bruce Wilson has been a Special Education teacher in District 14 in Brooklyn for the last 20 years. He enjoys incorporating technology into the classroom and especially likes to create iMovie projects.
Important documents for this lesson plan.
|


