|
LESSON 2: What is a magnetic field? |
|
LESSON 2: What is a magnetic field? |
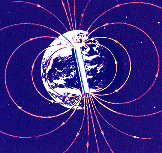
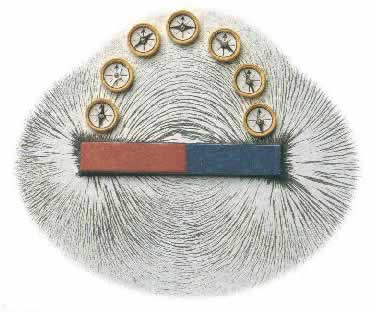
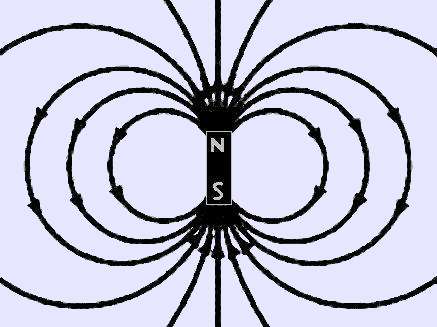
| AIMS: 1. What is a magnetic field? 2. What is a compass? 3. How do we make and use a compass? MOTIVATION: When the children experimented with their magnets, they should have noticed that the magnet attracted iron objects even without touching it. Explain that a magnetic field exists around all magnets. Show examples to the class. You can even measure the distances of the magnetic field around the magnets. Do all magnets have the same size magnetic field? PROCEDURE: 1. Have students research what a magnetic field is by logging on to the following web sites: http://brainpop.com/science/forces/magnetism/index.weml http://wondermagnet.com/dev/magfaq.html#q18 http://www-istp.gsfc.nasa.gov/Education/Imagnet.html The following are some pictures of magnetic fields taken from those websites:
2. Have the students perform the following experiment to see the magnetic field around different magnets. (For a blank, printable sheet, click here) (For student samples, click here).
|
|
3. From the
children's research, they have learned that the Earth is a giant magnet.
They will use this information to learn what a compass is, how it works,
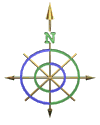
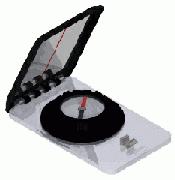
and how they can make their own compass. A. Students are to log on to http://www-istp.gsfc.nasa.gov/Education/Imagnet.html http://school-for-champions.com/science/magnetism.htm http://home.interserv.com/~skyblade/compass.htm and research what a compass is. The following pictures are some examples of compasses:
B. Hand out compasses to each student or pair of students. Have them hold the compass in the palm of their hand. Notice which way the painted end of the needle is facing. Explain that that direction is North and they should slowly turn their compass so that the N is in line with the painted end of the needle. Let the children label North in the classroom. Have each group of students find East, West, and South and label those as well. Ask questions like: 1. How do we know where North is? 2. How were we able to find the other directions? 3. How can we use a compass to find directions anywhere? 4. Have students make their own compass. From their research, they have learned that a piece of iron can be magnetized by rubbing it on a magnet. Do the following experiment: (For a printable student copy, click here). To see student samples, click here.
|
| Follow
up Activities: 1. Have students research the history of compasses. Who first discovered their use? How were they used? Good site to explore-http://sciencetech.technomuses.ca/english/schoolzone/Info_Magnets.cfm#temp 2. Have students make their own compass at home and find North, South, East, and West at their home. 3. For advanced students and older children, have them research the relationship between sunspots, the Earth's magnetic field, and the Aurora Borealis. |