|
This unit is about reexamining
the institution of slavery in the United States. An institution which
has greatly influenced the development and present power dynamics of our
country is still largely misunderstood by many in our nation. This unit
provides students the opportunity to reexamine this institution with more
depth in hopes of having a deeper understanding of it.
This unit also provides students the opportunity to research a specific aspect of slavery, and the present their research to the class utilizing multi-media. This allows students to engage in the process of constructing their own interpretation of the history of slavery.
Students work in groups to research a particular aspect of slavery of interest to them (for example, the laws regulating slavery, family life, etc.). Students then organize their research (both written and visual) into a powerful PowerPoint presentation to share with the class. Finally, students present their PowerPoint presentations to each other.
|
Christine Olson |
Christine Olson is in her fifth year of teaching History at Humanities Preparatory Academy, a small public high school in New York City. She received her Masters degree in Social Studies Education from Teachers College, Columbia University in 2000. She is currently a member of the planning team for The James Baldwin School, a new small school opening in fall 2005 as a replication of Humanities Preparatory Academy.
christine_olson@yahoo.com
|
Subject:
Social Studies, Technology
Grade Level: 9-12
Materials: Computers with Internet access, Microsoft Power Point software, projector, student worksheets.
|
|
Supplementary
Materials:
|
Student Worksheets & Guides
Storyboard Worksheet
Model PowerPoint
Example of Student PowerPoint |
Web sites: |
www.spartacus.schoolnet.co.uk/
USAslavery.htm
www.liu.edu/cwis/cwp/library/aaslavry.htm
www.learner.org/amerpass/unit07/
context_activ.html (especially for cultural aspects and interracial relationships)
www.pbs.org/wgbh/aia/home.html (PBS Africans in America website)
www.pbs.org/wnet/slavery/ (A NEW PBS website on slavery)
www.hfmgv.org/education/smartfun/
hermitage/open.html (a journey to one particular plantation)
www.yale.edu/lawweb/avalon/
statutes/slavery/slmenu.htm (especially for Laws)
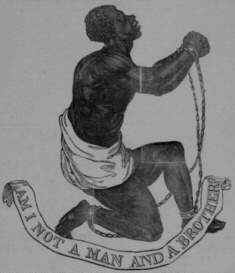
IMAGES: www.photography-
museum.com/faceof.html
IMAGES: http://loc.gov/
rr/print/list/082_slave.html
|
Day One:
|
Objectives:
- To encourage students to delve into the "world" of slavery by focusing on a particular aspect of interest to him/her.
- To facilitate student research using the Internet.
- To help students work in a group to complete a task.
Materials:
Computers with Internet Access
Project Overview/Research Guide for Students
Notetaking Guide for Students
Supplemental Resource Books on slavery (if desired). I recommend:
- An Eyewitness History of Slavery in America by Dorothy Schneider
- A Documentary History of Slavery in North America by Willie Lee Rose
- Rebels Against Slavery by Pat McKissack and Fredrick L. McKissack
- Breaking the Chains by William Loren Katz
- Roll, Jordan, Roll by Eugene Genovese
An Exit Ticket for each student
Note:
Although this project could be used as it is (as a research and PowerPoint presentation project), I introduced this project after our class had spent one week studying two slavery topics together: reading excerpts of Harriet Jacob's Incidents in the Life of a Slave Girl and having a presentation from the African Burial Ground, a research and educational site in New York City. This work gave students a common reference point for slavery, as well as time for them to consider an aspect of the institution of slavery that each wanted to learn more about.
Procedure:
Prior to this class, each student has provided preferences for a subtopic of slavery that he/she wants to learn more about. Possible topics for students to choose from are:
• Laws and Systems for Controlling Slaves
• Work that Slaves Did
• Family Life
• Slave Culture
• Runaways
• Revolts
• Other Forms of Resistance
• Poor Whites and Slaves
• Free Blacks/Life in the North
• Interracial Relationships and Childbearing
• Regional Differences - State by State
- Begin class by distributing the Project Overview and Research Guide. Read the project overview through as a class, and ask students for any questions about what they are being asked to do.
- Inform students of their groups and topics. While there are many different ways for assigning groups, I prefer to ask them the week before to preference the list of topics in their order of interest, and also to list three people who they work well with. Usually with this combination, I am able to form groups of three that give each student a topic he/she is interested in and at least one person he/she works well with.
- Students are asked to meet in their groups and are given 5 minutes to distribute the assigned portions of the project to different group members.
- Students are taken to the computer lab and spend the rest of the class researching their topic for their particular aspects (images, timeline, 10 facts, etc.). As they find useful information, they should record notes on the notetaking guide. Students looking for images should save interesting and useful images either onto a disk or into their directory, if the school's computers are networked.
- With five minutes of class left, teachers should distribute "exit tickets." This will allow the teacher to assess each student's research and respond to difficulties that arise in the first day. Students must give the teacher the exit ticket before leaving class.
Assessment: The teacher will collect the exit tickets and write responses on them, to be given back to the students at the beginning of the next class. Responses will include questions and/or suggestions to guide the next day's research. The exit ticket is a reflection of how the student's research went on the first day, as well as highlighting any difficulties that the student is having.
Homework : If the student has access to the Internet at home, he/she should continue the researchand notetaking at home. They will have one more day in class to research. If the student does not have the Internet at home, he/she should print out useful information from a website before leaving class, so he/she can read and take notes on it at home.
|
Day Two: |
Objectives:
- To continue student exploration of the "world" of slavery by focusing on a particular aspect of interest to him/her.
- To facilitate student research using the Internet, deepening the quality of the research from the previous day.
- To help students to work in a group to complete a task.
Materials:
- Computers with Internet Access
- Project Overview/Research Guide for Students
- Supplemental Resource Books on slavery (if desired)
Procedure:
- Each student will be given his/her exit ticket (with a response from the teacher) at the beginning of class.
- Students continue their research, responding to responses from the teacher and members of their group. Groups should sit together, so that they can share research, observations and useful information. Students continue to take notes as they research. The teacher circulates to assist students who are having difficulty. Note: It is important to have a second day in class to conduct research, so that other group members or the teacher can help those students who are having trouble, or who are stuck in their research.
- At the end of class, students hand in notetaking guides to the teacher to review before the next day's class.
Assessment: The notetaking guide will be evaluated for the quality of research that has been conducted for the PowerPoint presentation.
Homework: Complete all research and notetaking by the beginning of class tomorrow, when work on the PowerPoint will begin.
|
Day Three: |
Objectives:
- To have students see and evaluate a model PowerPoint presentation prepared by the teacher.
- To help students organize and synthesize their research using a storyboard.
- To have students make connections between their research on a topic in slavery, and the research of other members in their group.
- To support students to work in a group to complete a task.
Materials:
- Computer connected to a projector, installed with PowerPoint
- A model PowerPoint slideshow to show to students, on a topic of slavery that no group is researching
- Storyboard Worksheet for each group
Procedure:
- Teacher will present a model Power Point presentation to the students. (The teacher will want to create his/her own, especially if not familiar with PowerPoint.)
- Students will be asked to orally evaluate the PowerPoint slideshow presented, saying one thing that he/she liked about the PowerPoint, and one thing that he/she would change about the slideshow. This will help students think about what makes a high quality PowerPoint presentation as they begin to work on their group's presentation.
- Students will meet in their groups, share their research, and work together to complete a storyboard. Storyboards are a tool often used in movie and television production, and are a helpful way to organize your information before starting production. Each square will represent one slide, and they will fill each slide with a representation of what they will put on that slide. This will require the members of the group to synthesize their research into a logical and meaningful organization.
- At the end of class, each group will hand in their storyboard to the teacher for feedback. Groups should also evaluate what each student needs to write to prepare for the PowerPoint creation tomorrow, as this is the homework.
Assessment: The teacher will evaluate each group's storyboard to see if all required information for the project is there, for the quality of research, and for the quality of organization and connections. Students will also be evaluated for their use of images and text in the PowerPoint. Ideally, students will be evaluated based on the criteria generated by the student feedback from the teacher model.
Homework: Students will generate the writing needed for their PowerPoint, based on their research notes. They write their information into a format suitable for the PowerPoint slideshow. For example, images may need captions, some slides may include a paragraph story, some slides may include a list of bullet points, etc.
|
Day Four:
|
Objectives:
- To teach students how to use PowerPoint software.
- To have groups of students use storyboards to create a PowerPoint presentation.
- To organize and synthesize research into a powerful and effective multimedia presentation.
- To support students to work in a group to complete a task.
Materials:
- Computers with PowerPoint installed
- One computer attached to a projector
- "Creating a PowerPoint SlideShow" handout
- A scanner if students have found images in books that they wish to include in their presentations
Procedure:
- Students are given a copy of the "Creating a PowerPoint SlideShow" handout. They can use it as a reference while the teacher demonstrates how to do different tasks in PowerPoint.
- The teacher, using the computer attached to a projector so all students can see, demonstrates how to do a few things in PowerPoint: create a new slide, insert an image, insert text, animate text, switch between different views, save the PowerPoint, and rearrange slides. Because PowerPoint is fairly simple to use, this demonstration can be done in 10-15 minutes.
- Using their storyboards as returned from the teacher, and the handout for using PowerPoint, students work with their group to create their PowerPoint slideshow. I usually suggest that students switch who is "driving" the mouse every two slides, to make sure that each member is learning how to use the software.
Homework: Complete the PowerPoint slideshow for presentation to the class the next day. Depending on how your school's technology is set up, students will either need to save their PowerPoint on a disk (problematic because files are so large), or save it in a place on the network where it could be accessed by the computer/projector set up that will be used the next day.
|
| Day Five: |
Objectives:
- To help students expand their understanding of the complexities of slavery, by hearing and seeing presentations of topics other than the topic their group researched in-depth.
- To have students make connections between their group's topic and other topics in slavery.
- To have students practice their verbal communication skills by presenting their work to their classmates.
- To have students practice notetaking skills by taking notes on other students' presentations.
- To have students continue to work with a group to complete a task.
Materials:
- Computer connected to a projector
- Notesheet for students to use during presentation
- Group Evaluation forms
Note: Depending on how large your class size is, it may take more than one day for all students to be able to present their PowerPoint slide shows.
Procedure:
- Different student groups present their PowerPoint slideshows to the class. While one group is presenting, other students are prompted to take notes on a notesheet prepared for this purpose.
- At the end of each presentation, students are encouraged to ask questions to the group presenting.
Extension: As an optional extension to this project, I have asked students to write an essay drawing on information from all the presentations. The essay is organized around the question, "Why was slavery dehumanizing?," so students' notesheets have this question on top, and after each presentation, we briefly discuss what this showed us about why slavery was dehumanizing. (Also note that the essay question could be a different question that would tie all of the groups' research together.) This is an excellent assessment, too, of the learning that took place throughout this project, including the connections made between the different topics.
Homework:
For homework, students are asked to complete the Group Evaluation forms, in which students are asked to be as honest as possible in evaluating both themselves and their group members. (This is used in assessing the students, both individually and as a group.)
Assessment:
PowerPoint presentations are assessed for student understanding, quality of research, and clarity of presentation - both the PowerPoint and the oral presentation.
|
Standards:
|
Students will use a variety of intellectual skills to demonstrate their understanding of the necessity for establishing governments; the governmental system of the U.S. and other nations; the U.S. Constitution; the basic civic values of American constitutional democracy; and the roles, rights, and responsibilities of citizenship, including avenues of participation.
Information technology is used to retrieve, process, and communicate information and as a tool to enhance learning.
|
| |
|
| |
|
|


