Science Fair Projects are Fun!
Natasha Cooke-Nieves
Many of you are probably already doing science projects for expos at your schools or in your regions. Others might still be uncertain how to get started. Science Projects can be a useful tool for both students and teachers. Your children can become experts on a topic that interests them. It is very satisfying to complete a worthwhile project that relates to their favorite topic in science and is applicable to the real-world.
Before you start a project, make sure you define the project guidelines and set up a grading rubric for your students. Give the class a packet of the guidelines and the grading rubric at the beginning so there are clear expectations established from the start. In addition, have an outline sheet as one of the first pages in the packet. This will be filled out by the student and signed by their parent/guardian (or other adult family member that is assisting them) and handed back to you a month and half before the actual project is due.
FRONT PAGE OF PACKET:
- Due Date of the signed Science Fair Project Outline
- Due Date of the Science Fair Project, around 1 ½ months after outline is handed in
- Date of Science Fair
- Date of Math/Science/Technology Family Night. I usually establish one night of Science Fair Week as Family Night, where the families can come in to view the displayed projects. I also have math and science activity/game tables out with food for sale. (Always a fundraising opportunity!)
INSIDE OF PACKET:
- Safety Rules
- How To Pick A Topic
- List of Possible Ideas
- “Webliography” of internet sites to visit to get ideas for science projects
- Scientific Method Instructions
- Display Specifications
- Grading rubric / Judging criteria
How do you Pick A Topic?
Here’s a good rule of thumb: If you are interested in something, you will be motivated to do a good project. Think about your favorite things to read, watch or do. Science topics are all around us. Look around your home, school or community. Are there any special natural resources in your area? Are there any ideas for topics at museums, hospitals, airports, zoos, parks, science centers or universities? Look for ideas in science books in your local library, or check out the internet.
SOME IDEAS FOR TOPICS
- Which dishwashing liquid is the best degreaser?
- What is the average length of time of commercials on prime-time TV?
- Which conserves more energy: a bath or a shower?
- Do some rubber balls bounce higher than others? Why?
- Are fish scared by their own reflection?
- Which type of material is the best reflective surface for a solar oven?
- Which kind of adhesive bandage stays on the longest?
- Which animals in a zoo are kept in families? Why?
- Which kinds of fabrics are best for keeping you warm?
- Which kind of vinegar makes the best reaction (loudest, longest, most bubbly) with baking soda (sodium bicarbonate)?
- Which paper plates will hold more weight without buckling?
- Are snails attracted to or repelled by light?
- Does fertilizer affect the amount of algae growth in water?
- Design a feeding dish or mechanism which will prevent a large dog from stealing food from a little dog.
Webliography
There are many useful websites on science expos (or fairs as they are also called) and ideas for topics. One of the best and most comprehensive is: http://ipl.org/div/projectguide/
Scientific Method Instructions
The next step is to go to work like the scientist you are: You are going to follow the scientific method. It is important to have a good understanding about what the scientific method is before beginning your project. Sometimes you make discoveries by accident, but more often scientists develop a plan to test a theory or hypothesis they have. This plan is called a procedure. During the procedure, the scientist collects her/his data from their experiment. After analyzing the data, they make a conclusion.
Step 1: Ask A Question
You have to think of a specific question about the topic that the project will try to answer. Write it down. “How do we prevent global warming” would not be a good question for an expo experiment on the environment, for example, because the question is not specific enough to design a procedure that can answer it. A better question would be “How does increasing temperature affect plants that normally grow in cool places?” It would be more practical to design an experiment to try to answer this question. While it is important that your question be specific, make sure you don’t pick a question that is specific, but too difficult to answer. “Do larger gills allow fish to swim faster?,” is a specific question, but getting fish with different gill sizes and measuring how fast they swim would not be easy! Also make sure your experiment can be finished in time for the expo. Set up a control group and an experimental group. Remember to change only one variable.
→ do your research
- Look up additional information about your topic and your variable.
- Don’t forget to write down information for your bibliography.
- Use at least three different sources including books, magazines, Internet, interviews, encyclopedias, etc.
Step 2: Form a Hypothesis
Write down what you expect to happen before you try your experiment. This is your educated guess, or hypothesis. Your hypothesis should be very clear so that you can test it. Remember to be specific! Write your hypothesis in an “if …, then … ” format. For example, “If I water each plant three times a week with 20ml of water, then Plant A will grow the tallest.”
Step 3: Materials
List all the materials you will need.
.
Step 4: Methods/Procedure
Make a numbered list of each step you will need to take to prove your hypothesis. During your experiment, write down everything you do. Other scientists should be able to repeat your experiment by reading your procedures.
Step 5: Data Collection/Observations
As you perform the steps described in the procedure, write down your observations. You can
either describe what you see, or make measurements. These are your data. Your observations should be honest; report what you actually see, not what you think you should see. Once you have finished your procedure, organize your data visually – using a table, chart, graph, and/or pictures.
Step 6: Conclusion
Look carefully at your data. Decide what your data tells you about your hypothesis. Was your hypothesis correct or incorrect? Why or Why not? What is the answer to your original problem?
Step 7: Discussion/Application (Optional Or For Older Students)
After reaching your conclusions, think about what other experiments you could do to find out more answers based on your conclusion. How does this experiment apply to real life? How can your results enhance society?
WHAT SHOULD THE DISPLAY LOOK LIKE?
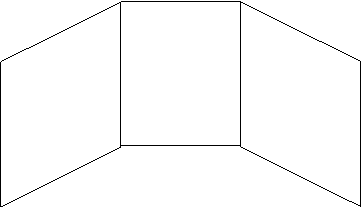
Start by sketching a display on paper. The title should be large and easy to read. Write down clear subtitles such as Title, Question, Hypothesis, Materials, Procedure, Data, and Conclusion. Purchase a tri-fold display board made of cardboard, poster board, or foam board.
Your display should be as neat and attractive as possible—typewritten reports are best—with no misspelled words. You can also use letter stencils and rulers to make a neat display. Keep the layout simple. Use cement glue or double sided tape—no staples!—to post paper and objects on tri-fold board. Use a computer to make labels, graphs and charts in color, if available. Include only the most useful or interesting photos, illustrations and observations. Use color to clarify data (graphs, charts, and diagrams). Make sure the display will fit into the space available for you at the expo. Use safe, durable materials. Let the teacher or expo organizer know if your display needs electricity or other special arrangements.
Questions or comments? E-mail me.
|


