Subject: Visual Arts/Life Science
Grade Level: High School
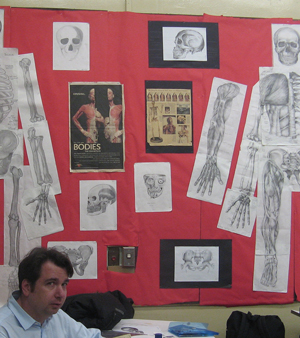
How it Works: I use art to add another dimension to learning. This series of sequential art lessons on human anatomy reinforce my students' Living Environment studies without teaching to the test. Applying the workshop model in the art classroom, students are actively engaged in creating drawings of the skeletal and musculature systems of the body. Inter-disciplinary, project-based visual art assignments reinforce students' science lessons while stressing cultural literacy and a strong visual communication skill set.
Final Project/Product: Students are asked to create fully-rendered tonal drawings of the skull, rib cage and pelvis using a variety of media that interpret the anatomical forms of the human body and demonstrate a functional understanding of how it moves. These conceptual drawings demonstrate that students can think critically about visual imagery and are in accord with national initiatives that move away from an emphasis on fact-based learning toward a focus on logic skills, concept-based understanding and thinking process.
Overall Value: These sequential unit lessons integrate art across the curriculum, specifically the Life Sciences, and provide important art-making educational experiences. In "A Plea For Visual Thinking," Rudolf Arnheim wrote, “Artwork, intelligently pursued, lets students take conscious possession of the various aspects of perceptual experience.” In today’s increasingly visually dominated culture, these skills are increasingly in demand.
Tips for the Teacher: Have fun with this! As we know, adolescents are extremely self-conscious about their bodies; their innate curiosity should suffice as motivation. There are a variety of ways to build upon these lessons based upon your own interest and assessment of your student population. You could debunk historical studies that use craniometry to advocate racism, or determinism -- such as who becomes a criminal. (I recommend browsing in Stephen Jay Gould’s "The Mismeasure of Man.") You could explore sports science introducing career paths such as physical therapy or incorporate nutrition by learning about the harmful effects of steroids. Enjoy! I welcome your suggestions and insight.
Link to Grant Project:
|
| Students will be knowledgeable about and make use of the materials and resources available for participation in the arts in various roles. |
| Grade: Commencement Subject: Knowing & Using Arts Materials & Resources |
| Students will develop an understanding of the personal and cultural forces that shape artistic communication and how the arts in turn shape the diverse cultures of past and present society. |
| Grade: Commencement Subject: Understanding the Cultural Dimensions and Contributions of the Arts |
| Students will understand and apply scientific concepts, principles, and theories pertaining to the living environment and recognize the historical development of ideas in science. |
| Grade: Commencement Subject: Math/Science/Technology |
| Students will understand the relationships and common themes that connect mathematics, science, and technology and apply the themes to these and other areas of learning. |
| Grade: Commencement Subject: Math/Science/Technology |
| Students will apply the knowledge and thinking skills of mathematics, science, and technology to address real-life problems and make informed decisions. |
| Grade: Commencement Subject: Understanding the Cultural Dimensions and Contributions of the Arts |
| Students will develop an understanding of the personal and cultural forces that shape artistic communication and how the arts in turn shape the diverse cultures of past and present society |
| Grade: Commencement Subject: Understanding the Cultural Dimensions and Contributions of the Arts |
| Day 1: Introduction to Shading (Tonal Values) |
| Objectives |
| Students will be able to create a range of tonal values from white to black. |
| Students will be able to conceptualize the distribution of light across a form lit by a single light source. This shading process is known as modeling form. |
| Students will be able to model the illusion of 3 dimensional forms by applying tonal values to flat, two-dimensional shapes. |
|
|
| Materials |
| White drawing paper |
| A variety of graphite pencils- minimum required 4B, 2B, HB, 2H |
| Assorted Generals Charcoal pencils (optional) |
|
| Procedure 1 |
| Vocabulary: |
| a. Elements of Art (Line, Shape, Value, Form, Color & Texture). The elements of art are the basic building blocks or pictorial syntax that artists use as a visual/tactile/kinesthetic language to express their individual points of view. This lesson focuses on value or tonal values commonly known as shading. In the lessons that follow, students will use their knowledge of tonal values to turn flat two-dimensional shapes in to 3D forms. Color and texture are not primary concerns for the purposes of this unit unless you choose to modify it to suit your student population. |
| b. Hatching - creating a tone with parallel lines |
| c. Cross-Hatching - creating a tone with at least 2 sets of parallel lines one on top of another The British Museum hyperlink included has a lovely reproduction of a Durer drawing of hands, a masterly display of cross hatching. See Day 1 Procedure Link 3. For a better view, open the document, "Day 1." |
| d. Stippling - creating a tone with dots -- William M. Irwins, print curator at the Metropolitan Museum from 1916 -1943, wrote 2 books that have marvelous examples of these techniques: "How Prints Look" and "Prints and Visual Communication." |
| Illustration of stippling http://science-art.com/gallery/47/47_732006224329.jpg |
| Procedure 2 |
| Developmental questions: |
| a. How are the properties of charcoal different than graphite? Charcoal is more painterly and friable (turns easily to dust). What is inside your pencils? Graphite replaced lead (Pb) because of lead's toxicity. Graphite is also used to lubricate machine parts. Charcoal is carbonized wood. Browsing recommendation- "The Pencil: A History of Design and Circumstance" by Henry Petroski |
| b. Distribute graphic aid handouts which can be obtained by going to the websites listed in this lesson and by opening the handout, "Day 1." Students compare and contrast the handouts and in a few sentences note the differences between them in order to begin to think critically about visual imagery. |
| c. Warm-up activity: students practice a variety of mark-making techniques using their supplies, i.e.: hatching, cross-hatching, stippling. See the vocabulary listings. |
| d. In this exercise students explore new ways to use familiar materials as well as experiment with new media. |
This Leonardo daVinci caricature is a wonderful illustration of hatching: http://royal.gov.uk/files/images/
Insight_Mail_Nov02_leonardo.jpg |
| Procedure 3 |
| Students create a tonal scale or strip with at least 5 boxes so that using the white of the paper for the lightest tone, they create at least 3 shades of grey. The rationale for this is that students often produce work that includes 1 or 2 shades and the extended study provided by this exercise focuses their attention on creating a greater progression. |
| a. Motivation - Doing little things well is a step towards doing big things better. |
Albrecht Durer's drawing of hands is a fine example of cross hatching: http://thebritishmuseum.ac.uk/
newsroom/archive2002/durer.html |
| Procedure 4 |
| Group reflection/ Summary |
| a. Have students share strategies for achieving success. |
| b. Use the Karate Kid analogy - wax on/ wax off. Drawing in small circles helps fill in the white spaces and creates continuous tones. |
| c. Have each student write one question in his or her notes to further discussion: something they would like to explore in greater detail. |
|
| Procedure 5 |
| Notes for Teacher |
| a. Students will become knowledgeable about materials as they experiment with new ways to use familiar materials and experiment with new media and drawing techniques introduced in each sequential lesson. |
|
| Extension |
| Homework -Draw an egg. This activity provides differentiated instruction for students who enjoy this assignment and display an attention to detail. Use plate finish (smooth surfaced not vellum) Bristol paper to create drawings of great depth and subtlety. |
|
| Day 2: Introduction to Drawing the Skull |
| Objectives |
| Students will be able to create an interpretation of the form of the skull in the front view. |
| Students will be able to create a line drawing expressing the volume and mass of the skull in the front view. |
| Students will be able to model the illusion of a 3-dimensional form on a flat surface using a variety of tonal values. |
| Students will be able to discuss the form of the skull using discipline-specific vernacular- anatomical terminology (i.e.- bony landmarks; planar conceptions-drawing conceptions of mass in space-open and closed forms) |
|
| Materials |
| Graphite Pencils 2B, HB, 2H |
| White paper |
| Graphic aids/ Handouts |
|
| Procedure 1 |
| Read aloud & discuss: |
| a. "Shading is based upon perceptions of change of tones of light and dark. These tonal changes are called values. A complete value scale will go from pure white to pure black, with literally thousands of minute graduations between the two ends of the scale…” From Betty Edwards, "Drawing on the Right Side of the Brain," p.180. |
| b. Review the Elements of Art: The Elements of Art are: Line, Shape, Value, Form, Color and Texture. The Elements of Art are the basic building blocks or pictorial syntax that artists use as a visual/tactile/kinesthetic language to express their individual points of view. The Elements of Art are not to be confused with Principles of Art such as composition, perspective, and color theory. |
| c. A helpful strategy for discussing the difference between shape and form (vital for these exercises) is to draw a triangle, square and circle on the blackboard. |
| d. Point out that if the shape is a circle the form is a ball or sphere; if the shape is a triangle, the form is a triangular prism or pyramid; if the form is a cube the shape is a square. |
| This URL will take you to an article on historic anatomical wax sculptures: http://medicina.unica.it/cere/mono02_en.htm |
| Procedure 2 |
| Distribute the handout, "Day 2," of the front view of the skull. |
| a. Students can compare and contrast the handouts and in a few sentences note the differences between them in order to begin to think critically about visual imagery. |
| b. Ask students to find large simple shapes that may help them plan out their drawing. For example, the shape of the skull can be conceived as a tapering flower pot or handleless mug. Some students have drawn a grid over the skull while others have used a compass to draw construction lines and make comparisons. |
| c. Note- You may choose to extend this lesson over the course of a couple of days in order to allow the students the opportunity to profit from creating a sustained study. |
|
| Procedure 3 |
| New Vocabulary |
| a. Bony landmarks are imaginary points on the bones that we use to measure proportion and indicate the origin and insertion points of muscles. Browsing recommendation: "Masterclass in Figure Drawing" by Robert Beverly Hale and Terence Coyle, published by Watson-Guptill. if you are computer savvy this would make a wonderful PowerPoint presentation -- see Day 2 Procedure 4D for additional information. |
| b. Planes in space - if we conceive of the basic masses of the bodies as box-like structures, each of these masses will have height, width & depth. In addition, each of these blocks will have a twist, tilt or balance; that is to say they will have an orientation in space. |
| c. Cranium – bones that house the brain. (This will be developed in the next lesson.) |
| d. Zygomatic Arch- cheek bone. Maxilla & Mandibula- create the jaw. |
|
| Procedure 4 |
| New drawing strategies for the creation of accurate and precise renderings (optional) |
| a. The Envelope is a drawing strategy used to construct in line the simplest flat shape that will contain the object or form to be drawn. Imagine one is shipping something by Fed Ex and you want to pack it well so it doesn't break. |
| b. The block-in is an extension of the envelope whereby one refines the envelope to more precisely mimic the shape of the object to be drawn. The use of multiple passes increases perceptual accuracy. |
| c. Note to the teacher: Robert Beverly Hale (1901-1985) was a curator at The American Wing of the Metropolitan Museum of Art and a legendary faculty member at Cooper Union, Columbia University and The Art Students League where he taught Artistic Anatomy for over 40 years. His lectures were videotaped and are available from the ASL. Philip Hamburger published a wonderful biography of him in the Profiles column of The New Yorker magazine on June 13, 1977. |
| d. THE LECTURES OF ROBERT BEVERLY HALE (VHS) 1985, color and black and white. This is series of ten lectures by the late Robert Beverly Hale on figure drawing and artistic anatomy, intended for figure and portrait artists. Hale demonstrates the basic structure, proportions, anatomical details, function and renderings of the human figure by using the human skeleton and step-by-step drawings |
| This URL will take you to an interview with R.B. Hale conducted for the Oral History project at The Smithsonian Museum: http://aaa.si.edu/collections/oralhistories/transcripts/hale68.htm |
| Procedure 5 |
| Mini Lesson |
| a. Question of the day: Why start with the bones? |
| b. Answer: The skeleton is universal and determines proportion. Muscle shape and size, body fat, adipose and cellulite distribution vary with character, lifestyle, and age. The skeleton provides a greater degree of control. Draw a connection to the scientific method - control vs. experimental groups. |
| c. Students draw the front view of the skull. |
| d. Summary / Group reflection: What did you find challenging about this assignment? Proportions? Shading? Details? Explain. Have students go on a gallery walk and examine each other's results. They should reflect upon how their peers handled the same problems and share strategies for success. Students should jot down one or two ideas based upon their learning walk for further study (i.e. - different ways of holding the pencil or using instruments. Do left-handed individuals shade differently than right? Yes, Leonardo daVinci's left-handed hatching is renown.) |
|
| Extension |
| When encountering varying degrees of facility in the classroom, graph paper is a wonderful tool to provide differentiated instruction. Students having trouble drawing accurate shapes can plot points and connect the dots in order to from more accurate shapes. Students should be encouraged to draw upon their prior mathematical knowledge (Geometry) when creating construction lines. |
|
| Objectives |
| Students will be able to create drawings that demonstrate an understanding of volume, proportion and control of the medium and interpret the form of the skull in the Profile View. |
| Students will be able to use to a variety of materials (conte, charcoal pencil, graphite pencil, etc.) and drawing techniques such as line, value and contour to create drawings of the skull in profile. |
| Students will be able to create a line drawing in white conte or white charcoal pencil expressing the volume and mass of the skull in profile. |
| Students will be able to model the illusion of a 3-dimensional form on a flat surface by building up the white conte/charcoal. What’s in front? What’s behind? The closer something is to you the greater the build-up. |
| We learn to draw by developing a sense of form, an ability to think in shapes and draw conclusions about how to best render them. Discuss the form of the skull using discipline- specific vernacular and anatomical terminology: bony landmarks; planar conceptions (drawing conceptions of mass in space). |
| Materials |
| See attached Cloquet Lateral & Sagittal (cross) section handout |
| White charcoal/conte pencils; black construction paper |
| Graphic aids and handouts |
| Additional supplies as needed |
| Procedure 1 |
| Review art terminology and practice using them. |
| a. Draw a circle on the board and ______just to the right of it. |
| b. Draw a ____ on the board and a cube just to the right of it. |
| c. Draw a triangle on the board and an underscore next to it. |
| d. Have students complete a chart to demonstrate the application and synthesis of the concepts of Shape & Form. |
|
| Procedure 2 |
| For an example of how anatomical structure of the skull influences surface forms, see illustrations in handout entitled "Day 3: The Skull in Profile." |
| a. Previously we have been making dark marks on a light surface. Now we will be making light marks on a dark surface. The tone of the paper and support surface will provide the halftones and shadow. |
| b. Demonstrate how to model a sphere using either a white charcoal or conte pencil on black construction paper or charcoal or pastel paper. Point out how we can create the illusion of a cast shadow by building up a white tone around the object. |
|
| Procedure 3 |
| Illustrate the bones of the cranium. See models in handout, Day 3. |
| a. The frontal forms the front plane of skull: forehead, brow & nasal cavity. |
| b. Occipital forms lower back portion of the cranium |
| c. Parietal forms the top portion of the sides of the cranium |
| d. Temporal forms the lower portion of the sides of the cranium |
| Illustrations of the bones of the cranium http://mnsu.edu/emuseum/biology/humananatomy/skeletal/skull.html |
| Procedure 4 |
| Students create a tonal scale on black paper using white charcoal or conte sticks or pencils. |
| a. Students draw a sphere lit by a single light source using white charcoal or conte pencils on black paper. |
| b. Students draw the skull in profile using white charcoal or conte pencils on black paper. |
|
| Procedure 5 |
| Notes to teacher: |
| a. In the previous lesson students practiced making dark marks on a white surface in order to turn 2-dimensional flat shapes in to 3-dimensional forms. Now students will be called upon to make white marks on a dark support in order to model the illusion of 3-dimensional form. |
| b. Point out to students that the highest point on the skull is not dead center but a little further back. |
| c. If students can conceive of the top, side and front of the zygomatic arch (cheekbone) they will usually achieve a powerful illusion of 3-dimensional form. |
| Streamlining Video samples of gross anatomy: http://people.musc.edu/~bacrotr/anatomy_on_the_web/samples.htm |
| Extension |
| Students can practice looking in a mirror and identifying anatomical landmarks on their face as evidence of accountable talk and that they’re synthesizing these concepts. Tracing paper overlays are a convenient way of labeling anatomical forms without destroying the drawings. Also, I usually distribute black construction paper for this assignment but any toned paper would work well. Strathmore or Canson charcoal/pastel papers would be ideal (budgetary constraints permitting). |
| Assessment |
| Important consideration- time permitting I would strongly encourage you to stretch this lesson out over the course of a couple of days. I have observed that students greatly profit from sustained study on this activity. This may be due to the fact that in order to successfully shade their drawing in this exercise students must consciously imagine a single light source and how it distributes light on a form that moves in space. What's in front? What's behind? When drawing with graphite some students may indulge in mindless shading where they are just coloring things darker towards the edges without thinking about how they are distributing their tonal values. Good luck! |
|
| Day 4: Introduction to the Thorax (Rib Cage) |
| Objectives |
| Students will create drawings that demonstrate an understanding of volume, proportion, control of the medium (graphite, conte, charcoal, colored pencil) and synthesize their knowledge of anatomy and interpret the form of the thorax. |
| Students will be exposed to the concept that the rib cage is a slatted, protective, egg-shaped cage for the contents of the cavity of the chest. |
| Students will model the illusion of a 3-dimensional rib cage form on a flat surface by imagining a single light source and distributing a range of tonal values that describe : What is in front? What is behind? |
| Students will discuss the form of the thorax using discipline specific vernacular and anatomical terminology, including bony landmarks and planar conceptions (drawing conceptions of mass in space). |
|
| Materials |
| White drawing paper |
| Assorted charcoal and graphite pencils |
| Optional red and blue colored pencils (i.e.- Prismacolor) |
| Handouts |
| Procedure 1 |
| The thoracic cage is formed by 12 pairs of ribs: •Only the first 10 visible in front |
| a. The upper 7 are true ribs – they attach the sternum (breast bone) to the vertebral column |
| b. The lower 5 are false ribs – they do not fully wrap around |
| c. Ribs 8,9 & 10 have a straps of cartilage whose origin ties on to the xiphoid process (the bony tip of the sternum) and create a cartilaginous rim called the thoracic arch |
| d. Ribs 11 & 12 are called floating ribs. They are not attached to sternum, but lie within the wall of the back (musculature tissue). |
| Image of Rib Cage: Click Here |
| Procedure 2 |
| Student Activity - In small groups students work on individual drawings of the rib cage. |
| a. Tip for the teacher: Eustress (stress that is deemed healthful or giving one the feeling of fulfillment- the optimal level of tension) is, as scientific research shows , what you want to create in your classroom to challenge and motivate your students. The increasing technical difficulty of these activities are designed to generate eustress. |
| b. The way I employ this in the classroom is to have students render a full rib cage and then draw the musculature on one-half it. I usually introduce colored pencils (specifically red and blue) for the myology. |
| This URL has clear illustrations of the false and floating ribs: http://mnsu.edu/emuseum/biology/humananatomy/skeletal/ribs/ribs.html |
| Procedure 3 |
| Lesson Summary |
| a. What is the shape of the rib cage? Hint for students- think of its function. How can we describe its shape. Be specific. Slatted, egg-like, protective structure, etc. |
| b. What organs lie within the rib cage? |
| c. What is the widest point of the rib cage? Usually rib 8. |
| d. What is the sternum? What is the xiphoid process? What is the thoracic arch? |
|
| Procedure 4 |
| Classroom Management tip |
| a. Order precedes learning. Be sure that your materials are prepared and students understand the procedures. |
| b. Consistency and routines are important. Routines should be established for distributing and collecting materials, storing and displaying art work, and working effectively together. |
| c. Excellent streaming videos about the body are available at http://health.discovery.com/beyond/. Click on the BODY ATLAS tab to access these videos. |
| Discovery.com Body Atlas: http://health.discovery.com/beyond/ |
| Procedure 5 |
| References for further research |
| a. "The Quick and the Dead: Artists and Anatomy," a Hayward Gallery exhibition catalogue, Exhibition curated by Donna Petherbridge, ISBN 1 185332 172 9 |
| b. "Scientific American," May 1948, "Vesalius: Discoverer of the Human Body. |
| c. Martin Gumpert's great "De Humani Corporis Fabrica" which founded modern anatomy, is also an unsurpassed work of scientific art. |
| d. "Artists & Anatomists" by A. Hyatt Mayor, published by The Artist's Limited Edition in association with The Metropolitan Museum of Art |
|
| Extension |
| A possible extension could be to discuss flexibility and gymnastics. |
|
| Day 5: Introduction to the Pelvis |
| Objectives |
| Students will be able to create drawings that demonstrate an understanding of volume, proportion, control of the medium (graphite, conte, charcoal, colored pencil) and interpret the form of the pelvis. |
| Students will be able to discuss the form of the pelvis using discipline specific vernacular and anatomical terminology; bony landmarks and planar conceptions (drawing conceptions of mass in space). |
|
|
|
| Materials |
| Sanguine Conte Pencils |
| Sepia Conte Pencils |
| Black Conte pencils |
| White or beige toned drawing paper (coffee or walnut ink can be used to tone white paper) |
| Procedure 1 |
|
| a. Students warm-up by practicing a variety of mark-making techniques with the new material (conte pencils). |
| b. Distribute reference handouts and graphic aids labeled Days 4 and 5. |
|
| Procedure 2 |
| The pelvis is the mechanical axis of the body. |
| a. The pelvis is the fulcrum for the musculature of the trunk and legs. |
| b. The pelvis is constructed of 3 bones. There are 2 innominate bones (without a name- that is to say the parts of the bone are defined (iliac crest, Ishium) but not the piece itself. The third bone is the sacrum (sacrificial bone). |
Additional information on the pelvis:
http://mnsu.edu/emuseum/biology/
humananatomy/skeletal/pelvic/pelvic.html |
| Procedure 3 |
| Student activity |
| a. In small groups, students create individual drawings of the pelvis. |
| b. Ask each group to come up with an object (for example, a propeller) whose shape resembles a pelvis. You may use any other strategy for successfully rendering the form in question. This will be shared later. |
| c. Classroom management tip - One of the keys to classroom management is to engage your students. When the students are motivated you can focus on instructional practice |
|
| Procedure 4 |
| Lesson Summary |
| a. Students share their best practices about learning to draw parts of the anatomy. |
| b. Gallery walk: Students display their work and the class walks around to review and comment. |
| c. Writing component - Students reflect upon their experience and record 3-5 sentences in their notes. This journal entry should include individual challenges, successful peer strategies, and what they learned about anatomy. |
| d. Strategies for Unit Assessment Keep in mind what is working well. How do you know it? What is your evidence? What should be modified after testing these techniques in the classroom? Why? |
|
| Procedure 5 |
| Recommended reading: |
| a. "Doctors: the Biography of Medicine" by Sherwin B. Nuland ISBN 0-679-72215-7 |
| b. "Prime Mover: A Natural History of Muscle" by Steven Vogel ISBN 0-393-32463-X |
| c. "The Hand: How its Use Shapes the Brain, Language, and Human Culture" by Frank R. Wilson ISBN 0-679-74047-3 |
| d. "Encyclopedia Anatomica: Museo La Specola Florence" published by the Taschen Press. Note that there are 2 versions: an abridged and an unabridged. Either is an excellent resource for our purposes. |
|
| Extension |
| Drawing skills can be applied to any learning situation. By understanding form and function, students begin to appreciate their subjects. |
| Assessment |
| Unit Assessment: Students will use their drawings to describe the functions of these bones. How does the skeleton protect the organs and systems of the body? |
|
|

Jonathan Pincus
jspincus2@schools.nyc.gov
Midwood High School at Brooklyn College
2839 Bedford Avenue
Brooklyn , New York 11210
People use a variety of forms to express their egos. It is through the quotidian activities that we express our innermost nature. For Jonathan Pincus there is teaching, practice & research. A native New Yorker, DonorsChoose grant recipient, and product and employee of the New York City Department of Education, Mr. Pincus maintains that visual imagery has come to play an increasingly dominant role in our culture. Today’s students need pictorial syntax and strong visual vocabularies to complement their traditional text and symbol-based curricula. Project-based interdisciplinary lessons that incorporate new media and technology are a valuable means to equip students with these skills.
Important documents for this lesson plan.
Day 1
Day 2
Day 3
Day 4
Day 5
|


