 \
The objective of the lessons of this unit is to teach the principles of
art and the elements of design through the study of art history. We begin
our journey with prehistory. We will learn what the principles of design
are and then create a cave painting creating a texture to look like rock.
We will then use a variety of lines to create pictographs.
\
The objective of the lessons of this unit is to teach the principles of
art and the elements of design through the study of art history. We begin
our journey with prehistory. We will learn what the principles of design
are and then create a cave painting creating a texture to look like rock.
We will then use a variety of lines to create pictographs.
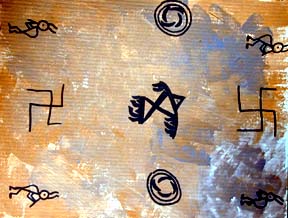
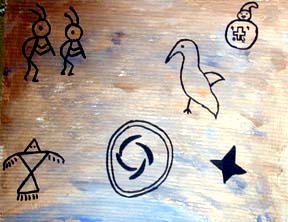
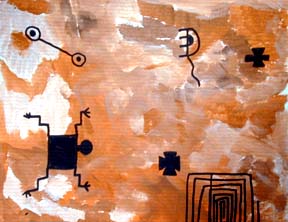
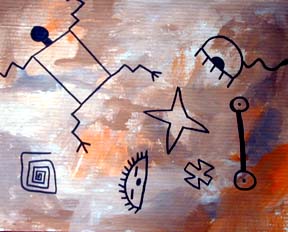
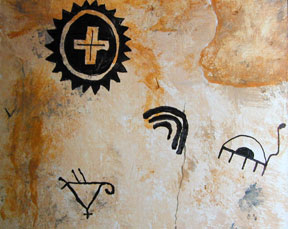
Examples of student work
Lesson 1: Principles of Design This lesson needs to be taught in a computer lab.
The objectives are: to learn what the principles of design are and demonstrate understanding of the concept through answering the questions on the worksheet..
Time: 1 class period of approximately 45 minutes.
Advanced preparation: Make copies of the worksheet.
To Assess the lesson, grade the color sheet below.
balance, contrast, proportion, pattern/rhythm, emphasis, unity, and variety
1st: Click here to download the Microsoft Word Document to go with this lesson.
Lesson 2: Learning about line This lesson needs to be taught in a studio or classroom.
The objectives are: to learn about the different variety of lines and learn these vocabulary words: diagonal, horizontal, broken, dashed, parallel, wavy, curved, zigzag, perpendicular, diagonal.
Time: 1 class period of approximately 45 minutes..
|
|
1st: Pass out a piece of paper and have the kids fold it so there are 8 equal rectangles. They will use each space to draw a different kind line.
Ask them to draw a happy line, a strong line, a peaceful line, a weak line, a wild line, a sad line, a lazy line, a motivated line.
2nd: Brainstorm all the different kinds of lines there are and try to elicit vocabulary like: diagonal, horizontal, thick, thin, broken, dashed, parallel, wavy, curved, zig-zag, perpendicular, diagonal....................................
3rd: Look at pictures of pictographs or petroglyphs and notice the different kinds of lines. A great book to use is called, Rock Art Symbols of the Greater Southwest by Alex Patterson, published by Johnson Books (ISBN 1-55566-091-6)
HERE ARE SOME LINKS FOR IDEAS:
Draw your own rock art Links for ideas for rock art project
4th: Have the students pick pictographs they might like to use on their project for the next class.
Lesson 3: Creating Rock Art on Paper
The objectives are: to experience mixing complementary colors to make neutral colors, to add white to create tints, to learn how to create texture using different values of colors, to use a variety of lines, to use the principles of design in composing the piece.
Time: 2 class periods of approximately 45 minutes..
Advanced preparation: Make copies of the worksheet.
To Assess the lesson, use the project rubric.
 |
1st: Review the complementary color combinations. They will be using blue and orange to make neutrals. Use Reynolds freezer paper and tape big squares on the table tops to use as palettes. Squirt small piles of white blue and orange on the palettes and ask the students to make 6 piles of different neutral colors. Make sure one looks like brown. 2nd: Have them use these colors to dab paint on the surface of a paper to look like rock. Demonstrate using a sponge or stamping with a brush. 3rd: The students need to finish their textured paper this period, so that it is dry for the next day. 4th: The next class they use the principles of design and a variety of lines to create their own petroglyphs.
|
Stone age art includes art forms created during the first known period of human culture in Europe. Characterized by the use of stone implements, the period is divided roughly into three segments:
Paleolithic (c. 35,000 - 8,000 BC);
Mesolithic (c. 8,000 - 3,500 BC);
Neolithic (c. 5,000 - 1,500 BC).
By using radiocarbon dating, archeologists have been able to associate their findings with these distant time periods. Cave paintings with animals and the so-called Venuses--statuettes of women, often pregnant--have been found suggesting the practice of hunting and fertility rituals.
As the Ice Age of the late Paleolithic gave way to a transition period, the Mesolithic, Europe became climatically, geographically and biologically much as it is today. In the Mesolithic Period, the art-forms shift to more stylized human figures in wall paintings and on engraved bone and antler.
By the Neolithic or New Stone age, the advances in technology such as farming,weaving, the advent of pottery and the construction of monumental structures such as Stonehenge, indicate that humankind--once strictly nomadic--begin to settle and develop their land.