Drawing
Into The Imagination
Essential
Question: How can a work of art draw you in?
|
|
By
focusing on multiple interpretations of Saul Steinberg’s work, sixth-grade
students exercise their imaginations and are inspired to write and illustrate
their own fantasy stories. The students learn to create a non-linear story with
multiple possibilities and endings. Their visual narratives are linked via text
and imagery. Here is my students' collection of diverse works of art:
http://thebleedingedge.org/features/6_imagine/6_imagine.html
Follow these steps to help your students create similar adventures . . .
Motivation:
Sixth grade students are introduced to the work of Saul Steinberg using the following web sites and/or print media provided by the teacher:
The Saul Steinberg Foundation http://saulsteinbergfoundation.org/gallery.html
Lambiek.net http://lambiek.net/steinberg_saul.htm
Using
the attached “Brainstorm Worksheet”, students choose an image by Steinberg
that “draws them in.” Each student describes what he or she “read into”
the image, and then imagines “jumping into” a section of the story. This
could be an oral discussion in class, or a brief writing assignment.
Procedure:
1. The teacher elicits from the students a description of the style that is typical of many of the Steinberg drawings (mostly black and white lines, limited use of color, crosshatching of lines to show depth). There is a follow up step-by-step lesson on the board using lines to draw a geometric shape, and use of crosshatching (over-lapping) to give the shape a sense of three-dimensional volume on a two-dimensional surface.
| NOTE: Background information on Steinberg and links to articles about his work may be found at Artcyclopedia: http://artcyclopedia.com/artists/steinberg_saul.html |
2. Each
student then brainstorms a narrative of his or her own which has a beginning,
two possible plot developments, and two possible endings.
3.
Using their brainstorming worksheet as reference, each student sketches the
visuals and story idea on the attached “Storyboard Worksheet”. They are
instructed to use lines only to create the visuals. Crosshatching can be used to
show depth and texture.
4.
Each student sketches 3 possible icons that could be used to symbolize their
story.
5.
Each student sets up a hierarchy of nested folders on the computer, where they
will store their work in progress, media saved for the web, and their html
pages.
6.
The students learn to use Photoshop as a drawing tool. They set up a series of 5
blank 4” x 5” Photoshop files (home, middle_a, middle_b, end_a, and end_b)
and a 1” x 1” file to draw the icon that will represent their project on the
WWW.
7.
The students learn to use Dreamweaver, a web-authoring tool, to modify a
template given to them by the teacher. (Note: other web authoring programs
will also work.) They modify the template by choosing their own color themes for
fonts and background, and inserting their icon and story title on each html
page. Once they have modified the template to their liking, they use the “save
as” command to replicate and create 5 web pages (home.html, middle_a.html,
middle_b.html, end_a.html, and end_b.html).
8.
Using his or her storyboard as reference, each student inserts the appropriate
image on the page. They use the type tool to word process the corresponding
parts story directly on each web page.
9.
The students use Dreamweaver’s image mapping ability to create hot spots on
specific parts of the images that will bring the user to another web page. The
students use Dreamweaver to create links on specific words within the text that
will bring the user to another web page.
10.
The students use Dreamweaver’s spell check command to review and correct their
text.
The complete web pages are tested on a web browser before uploading the projects on the Internet. Student projects are assessed according to artistic technique (eg application of cross-hatching); writing of narrative; and technical accuracy in linking files to each other.
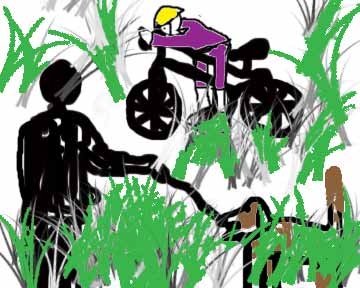
Here are some examples of student drawings representing a range of ability:
High quality.
The artist uses crosshatching to show depth, detail and values of darkness in
the drawing.
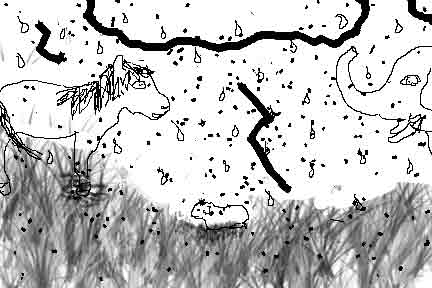
Medium quality. A beautiful drawing,
evidence of crosshatching in the horse's mane. The grass was done with a
Photoshop tool.
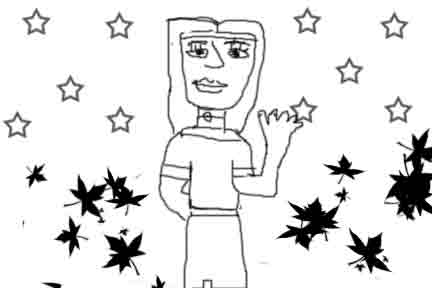
Lesser quality. The artist uses only line to draw the figure. Crosshatching could have enriched the drawing.
Meryl Meisler for TeachNet © 2004