Computer Lab Kid Pix Slide Show / Drawing the Pictures (Jan Brett) Part 1
This lesson is a little more complicated than the Bill Peet one.
Prerequisite: Completion of Bill Peet Kid Pix Lessons
Install Kid Pix on the computers.
Make an alias of the start up icon.
How to make alias: Click on startup icon one time to select it. Go to the finder and under file select "make alias". This will make a copy of the startup icon. Drag the extra startup icon to the desktop or another easy place for your young students to find.
Practice using the software so you feel comfortable demonstrating to your students.
Step-by-step Procedures
Objective: Students will learn how to make their Kid Pix drawings more elaborate while they retell the beginning, middle and end of a story.
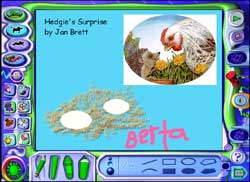
Anticipatory Set: Bring the book "Hedgie's Surprise " by Jan Brett to the lab and discuss what happened in the beginning, middle and end. Look at the borders and the details of the pictures together and discuss them.
Input: Here's where you teach them how to use specific tools in Kid Pix. They will sit and listen for your whole brief explanation and then when they go to their own computers, you will be available to help then as well. (See examples below)
1) Using the type tool:
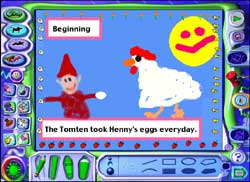
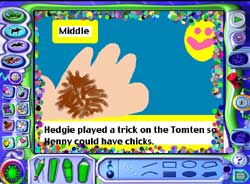
Open a new picture in Kid Pix. Click on the tool with a "T" on it. Click on your drawing canvas, and you will see a text box. You can select a font and size below, and the color of the font will be determined by the color chosen in the color palette on the bottom left. Type the word "beginning" in a large enough font to see (22 is good). Now click on another place in the canvas area for a new text box and type a sentence about the beginning of the story.
2) Making a box around the type:
Choose a color and click the pencil tool. Go to the button I have circled below.
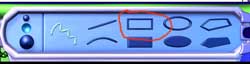
Click and drag a box over each text box with this tool,
 These three arrows point
to the different tip sizes you can choose for each tool. If you selected
the bottom box, the box you draw around the text will be the thickest.
These three arrows point
to the different tip sizes you can choose for each tool. If you selected
the bottom box, the box you draw around the text will be the thickest.
3) Filling in the background:
Now choose a color for the background. Click the button that looks like a paint bucket and click on your canvas. It should all fill with the color you chose except for the white space around the text. This makes the text easier to read.
4) Drawing the picture:
Show the students the different textures the tool options make when you are using the pencil tool. Then click on the paintbrush tool and show them how to change the brush options by clicking on the different textures displayed.
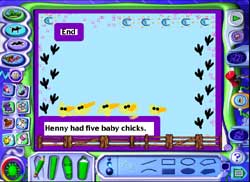
5) Making a border:
Click on the tool that looks like a stamp, and choose a stamp that suits the subject matter of your drawing and stamp a border. Overtime you click, it will stamp. You can use the paintbrush tool to paint a border too.
6) Saving the picture:
Click the red icon of a disk to save the picture and have them type, "Brett 1". The next picture will be saved as "Brett 2", and the last as "Brett 3".
Checking for Understanding: Quiz the students on what you just taught them.
Guided Practice: Send them off to their own computers to make their pictures.
Closure/Informal assessment: Get out a talking piece (I use the learning ball) and pass it around letting the students share what they learned.
Tomorrow they will take these pictures and make a slide show with them.