Portfolio Logistics
Carl Sannito
As I near the end of my twelfth year of teaching, I find myself again trying to remember all of the wonderful projects and activities that I have done with my students. Teachers put so much time into planning their classes and we obviously put a great deal of energy into the school day itself, but when it comes to looking back and keeping a scrapbook or a record of the work we have done, we sometimes miss the bus.
I’ve found two pieces technology that can really help out when it comes to keeping my memories close to my fingertips: a scanner and/or a digital camera. They can also help organize the work itself.
For instance, I had a huge art project that my students created a few years ago. It was a visual timeline of major events in the history of North America. This was our culminating project for our social studies class when I taught fifth grade. At the end of the school year, I made a list of over 100 major events in North American history. I typed each one onto a sheet of paper, put them in a bag and each student drew an event. They then had to research the event, write a paragraph about the event and draw a picture representing the event.
The activity was great. Over a few days, each student got to do between 3-5 events each. I then took the pictures, laminated them with titles and dates, and then put them in order. I hung this monster of a project in the hallway. Here are a few photos so you can see what it looked like:
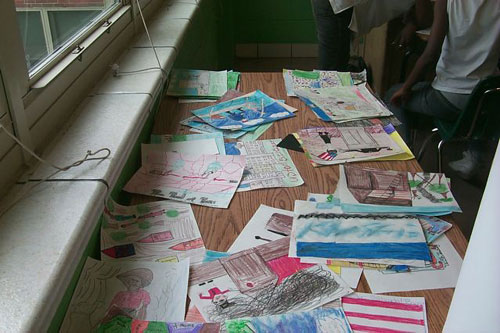

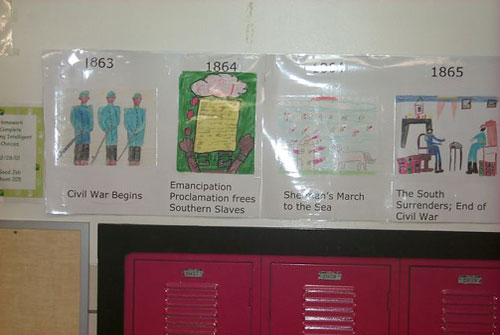
Now the project itself was very successful. I feel as though the students learned a lot about how all these events tied together. I personally loved integrating art and social studies together. The only problem came when the school closed and I had to take the art down. I moved on to another school, but what was I going to do with all this art?
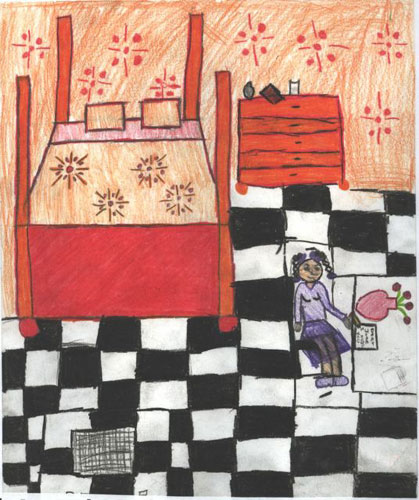
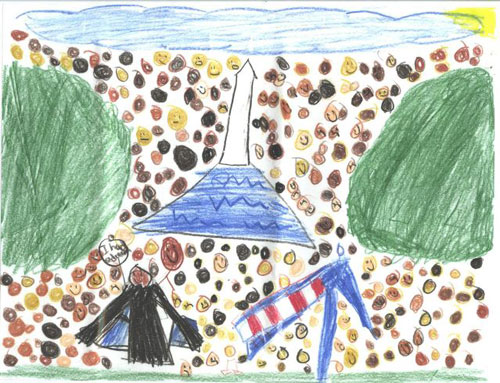
This is where a scanner comes in handy. I wound up scanning each piece of artwork into my computer individually. It took some time, but once I got the routine down it moved quickly. The advantage is that now I have more flexibility with the artwork. If I want to print it out, it’s always there for me. If I need to show a colleague, I can pull it up on my computer or even e-mail it to them. If I want to make a book out of the whole thing, I could put one together and have that printed out. I can even include a few more pieces in this article, like so:

It sure beats having to lug around all 130 pictures. It also prevents me from having to worry about damaging the pictures. I learned this the hard way. I kept the pictures for a few years before I scanned them and there was some damage to the drawings. But the way they are scanned in now is the way they will always look; no deterioration at all.
The scanner I have at home is part of a printer/scanner combo. The one I use at work is flatbed scanner, nothing fancy. Both can be purchased at Best Buy or Circuit City or any computer electronics store. A quick Google search on how to buy a scanner gave me a lot of information. For the purposes of archiving student work, you don’t need to spend a lot of money at all on a scanner. You’re not going to use all the bells and whistles, you just need something to get you started.
But what’s served me even more than a scanner has been my digital camera. I’ve had a variety of different cameras since the late 90’s and I’ve acquired literally thousands of photos from teaching alone (6,347 to be exact). I cannot tell you how glad I am that I have always kept a digital camera charged and ready to use in my classroom. I’ve documented so much of my students’ work that I have a great record of our highlights over the years. (It’s also a great help when it comes to student discipline. If I see a student acting up, I just whip out the camera and say, “I can’t wait to print this out for your mother! Smile!” Amazing how quickly things return to normal!)
Some cameras come with a “docking station,” where the camera sits and charges so it is always ready to be used. (Kodak EasyShare cameras have a docking station and are very easy to use.) It’s great if you can also have that docking station connected to a computer too: return the camera to the docking station, tap a button, and bingo the pictures transfer immediately to your computer. You don’t need to do it this way, though. I know many teachers bring their camera home and do all their work on their home computer.
I do recommend doing it only on one computer. Sometimes the photos can really pile up and you don’t want them spread over multiple computers in different locations. I learned this lesson the hard way.
When you do get the photos on your computer, the most important thing is to take a moment and document what the individual picture or batch of pictures is about. You also want to include the date somewhere. Most cameras are bundled with some type of software to help you keep track of your photos. Windows Vista and OS X also have software bundled with them to help you accomplish this. There are also a variety of websites to help you, including KodakGallery, Flickr, and Picassa. Which software or web site you use to organize your photos is less important than having a system and sticking to it. It makes it easier when you want to find things.
Both a scanner and a digital camera will go a long way to helping you keep track of your projects and assist you with archiving materials. They are both invaluable tools for creating materials for your professional portfolio as well. Consider investing in them; I think you’ll find them worthwhile.
If
you have a comment or suggestion, you can e-mail Carl at carlsannito@yahoo.com.
See also, Documenting Your Year With iPhoto by Allisyn Levy. |


