
Rain
Forest Adventures
Grades: 3-5
Teacher: Alice Hom
Location: P.S. 6
Lesson
1 - Where Are the Rain Forests?
Objective: Identify and
describe where tropical rain forests are located and learn the geographical
correlation between rainfall and rain forest.
Vocabulary:
equator,
continent, climate, tropical, humidity
Materials:
Wall
Map
unlabeled
world maps - 1 per child
(see samples)
markers
or pencil crayons
chart
tablet paper
Post-it
arrows
Procedure:
1. Students will brainstorm what they think they know about tropical rain
forests - where they're located, characteristics of these environments (see FYI-
Teacher Sheet). These will be listed on chart paper and hung in the room for future
reference.
2. Students will look at large wall map and identify location of continents,
oceans, the equator, and the Tropics of Cancer and Capricorn. They will learn about the areas with at least 80 inches of
rain fall, and a year-round average temperature of 80 degrees with 83% humidity. Post-it arrows will be used to mark where rain forests are located.
3. On their own unlabeled world map, students will color in and label the
areas where rain forests are located.
Follow-up
activities:
1. Research average rain fall in specific places where rain forests are
located and create a bar graph.
2. Using data on monthly average temperatures in the rain forest, students
will create a line graph.
Lesson
2 - Layers of the Rain Forest
Objectives: Students
will learn about the four layers of a rain forest, the types of vegetation found in each area, and identify animals found in each layer.
Materials:
Wonders
of the Rain Forest by Janet Craig
non-fiction
books
Grolier's
CD-ROM
Internet
sites:
www.mobot.org/MBGnet/sets/rforest/animals/index.htm
www.geocities.com/rainforest/3678/home.html
www.zoomdinosaurs.com/subjects/rainforest
lined
index cards - 4 x 6
Inspiration
CD-ROM
Poster
board, markers
Procedure:
1. Read chapter from Wonders of the Rain Forest identifying and describing the layers of the rain forest:
emergent, canopy , understory, and forest floor (see FYI - Teacher
Sheet).
2. Divide students into small groups and assign each a layer of the rain
forest to research. Using materials
and resources in the classroom, computer room and the library, students will
gather information on the kinds of plants and animals found in their specific
layer and make notes on index cards.
3. Students will organize and present information in one of the following
ways:
a. Inspiration - Webbing or
Diagramming
b. Poster board presentation
Follow-up
Activity:
Class
will create a mural or bulletin board depicting the layers of the rain forest
and place labels or pictures of plants and animals in the layer where they can
live and grow.
Lesson
3- Camouflage: How & Why
Creatures Blend into their
Environment
Objective: Students
will explore how an animal's coloration and patterns aid in survival in its
environment.
Materials:
Looking
for Henry by Elaine Livermore
photos
of camouflaged animals
shoe
boxes
magazines
scrap
materials (cloth, yarn, buttons, etc.)
glue
Vocabulary:
camouflage,
coloration, patterns, horizontal, vertical
Procedure:
1. Photos of animals that are well-camouflaged in their environment are
shown to introduce the concept of camouflage. Students identify the animals.
2. Read Looking for Henry.
3. Discuss patterns and colorations.
4. Students work in small groups to create their own creature that will
blend into their own unique environment using the above materials.
5. Students will write a paragraph which names the creature they created,
describe its environment, and tell what kind of food it eats.
Follow-up
Activity:
Students
will look at photos/pictures/videos of rain forest animals and describe the ways
their patterns or coloration help them blend in with their environment.
Lesson
4: Tropical Rain Forest Terrarium
Objective: Students will create a simulated rain forest environment and record
observations about plant growth and transpiration.
Materials:
2
liter soda bottles - 1 per group of four students
plastic
wrap
small
pebbles or gravel
crushed
charcoal
humus-rich
soil or potting soil
lima
bean seeds or small tropical plants like African violets
moss
masking
tape
water,
air, sunlight
rulers
Procedure:
1. Rinse soda bottles. Cut soda
bottle most of the way, but not completely, around at the top where the bottle
begins to curve.
2. Fold plastic wrap and line bottom of bottle.
3. Make rain forest soil: 1) 4
cm. of pebbles or gravel, 2) 4 cm. of charcoal,
3)
4 cm. of soil layered on top of each other.
4. Place seeds 4 lima bean seeds or plants on soil and cover (roots) with
moss and more soil.
5. Tape bottle together where you cut it in step 1.
6. Water your terrarium enough to moisten, but not soak, the soil.
7. Place in soil and observe daily. The
first few days, you may need to add water to the terrariums. Once the seeds or plants begin to grow, this will no longer be necessary. Due to transpiration, the moisture will rise to the top of the bottle and
rain down on the plants.
8. In science journals, students will summarize steps to creating their
terrariums. They will describe conditions necessary for the seeds/plants
to grow. Predictions will be made on how tall the the plants might grow.
Follow-up
Activity:
Students
can create science journals to record daily observations and growth of plants
over the course of 1-2 months.
Questions to guide students might include the following:
- How do plants get air inside the terrarium? (Air is recycled via plant
respiration. Plants absorb carbon dioxide and give off oxygen during the
day. At night, plants turn oxygen back into carbon dioxide.)
- How is water recycled in the rain forest? (Plants absorb water from the
soil up to their leaves. Leaves release the water into the air as
vapor. In the closed terrarium, water vapor turns into water
droplets. This water trickles back into the soil and will be used over and
over again.
- Explain evaporation, transpiration, and condensation in relation to the rain
forest environment.
- What can disrupt this ecosystem?
Lesson
5: Products from the Rain Forest
Objective: Students
will learn about everyday products that have their origins in tropical rain
forests. They will discuss the
benefits of certain products and the need to protect these environments in order
to harvest and use the resources in a sustainable manner.
Materials:
Brazil
nuts
article
made of mahogany or bamboo
coffee
beans
can
of insect repellant
soap
chewing
gum
rubber
gloves
worksheet - Rain Forest Products
Procedure:
1. Ask students if they can think of items which may have come from the
rain forest. Show samples of products in the classroom or brought from home.
2. Give each child a copy of the Rain Forest Products
worksheet. Have them list five that
are most important and in pairs, explain why they chose those items.
3. Have students take their list home and work with parent(s) to check off
items they can find in their homes. Children
should be prepared to share their checklists and to discuss the importance of
rain forests in their daily lives.
Follow-up
Activities:
1. Have a showcase of products from the rain forest and group into
categories.
2. Invite a pharmacist or doctor to talk about medicines made from plants
originating in the rain forests.
Lessons
6 - 10: Rain Forests - African Congo & South America
Objective: Students
will research a plant or animal from the rain forest and identify its physical
location within the rain forest. They
will contribute to a group or whole class project about the organisms in the
rain forest and make oral and multimedia presentations.
Materials:
chart
paper
colored
yarns
markers
poster
board
non-fiction
books, reference materials, and science magazines
Grolier's
CD-ROM
4
X 6 index cards
Inspiration
HyperStudio
,
KidPix or ClarisWorks
Internet
sites -
www.mobot.org/MBGnet/sets/rforest/animals/index.htm
www.geocities.com/rainforest/3678/home.html
www.zoomdinosaurs.com/subjects/rainforest
Procedure:
1. Class will be divided into two groups, one to research the African Congo
rain forest and the other to research a South American rain forest. Within each group, half will make a list of animals and the
other half will make a list of plants found in their specific region. These will be written up on chart paper.
Possible
Organisms for Research:
-
Plants: fern, Brazil nut, cecropia, strangler fig, palm trees, cocoa, orchid, bromeliad, passion flower, cashew, manioc, yucca,
heliconia, mahogany, rubber fungus
-
Animals: black rhinoceros, gorilla, colobus monkey, golden cat, butterfly, gray
heron, African emerald cuckoo, green mamba, okapi, mandrill, anaconda, jaguar, puma, tarantula, toucan, sloth,
macaw, coatamundi, saiman, boa constrictor.
|
2. Students will select or be assigned an organism from the list to be
researched. Index cards will be
used to record their information.
3. Students will cooperatively present their research in one of the
following ways:
-
HyperStudio,
KidPix or ClarisWorks slideshow presentations - one showing information on animals and plants in
the African Congo and another on those found
in a South American rain forest.
-
Creating
a Web or Diagram (using Inspiration) of the two different environments with
their plants and animals.
-
Bulletin board/poster board showing food chains. Colored yarn may be used to connect organisms to one another to
illustrate the concepts of food web,
symbiosis, competition for resources, or predator-prey relationships.
Follow-up
Activities:
1. Students create their own test
questions to share with class.
(See sample list of possible
questions)
2. Rain forest Jeopardy Game.
3. Visits to Bronx Zoo's African Congo Gorilla Forest and the Central Park's
South American rain forest exhibits. Compare
and contrast the two kinds of environments.
PHOTOS:
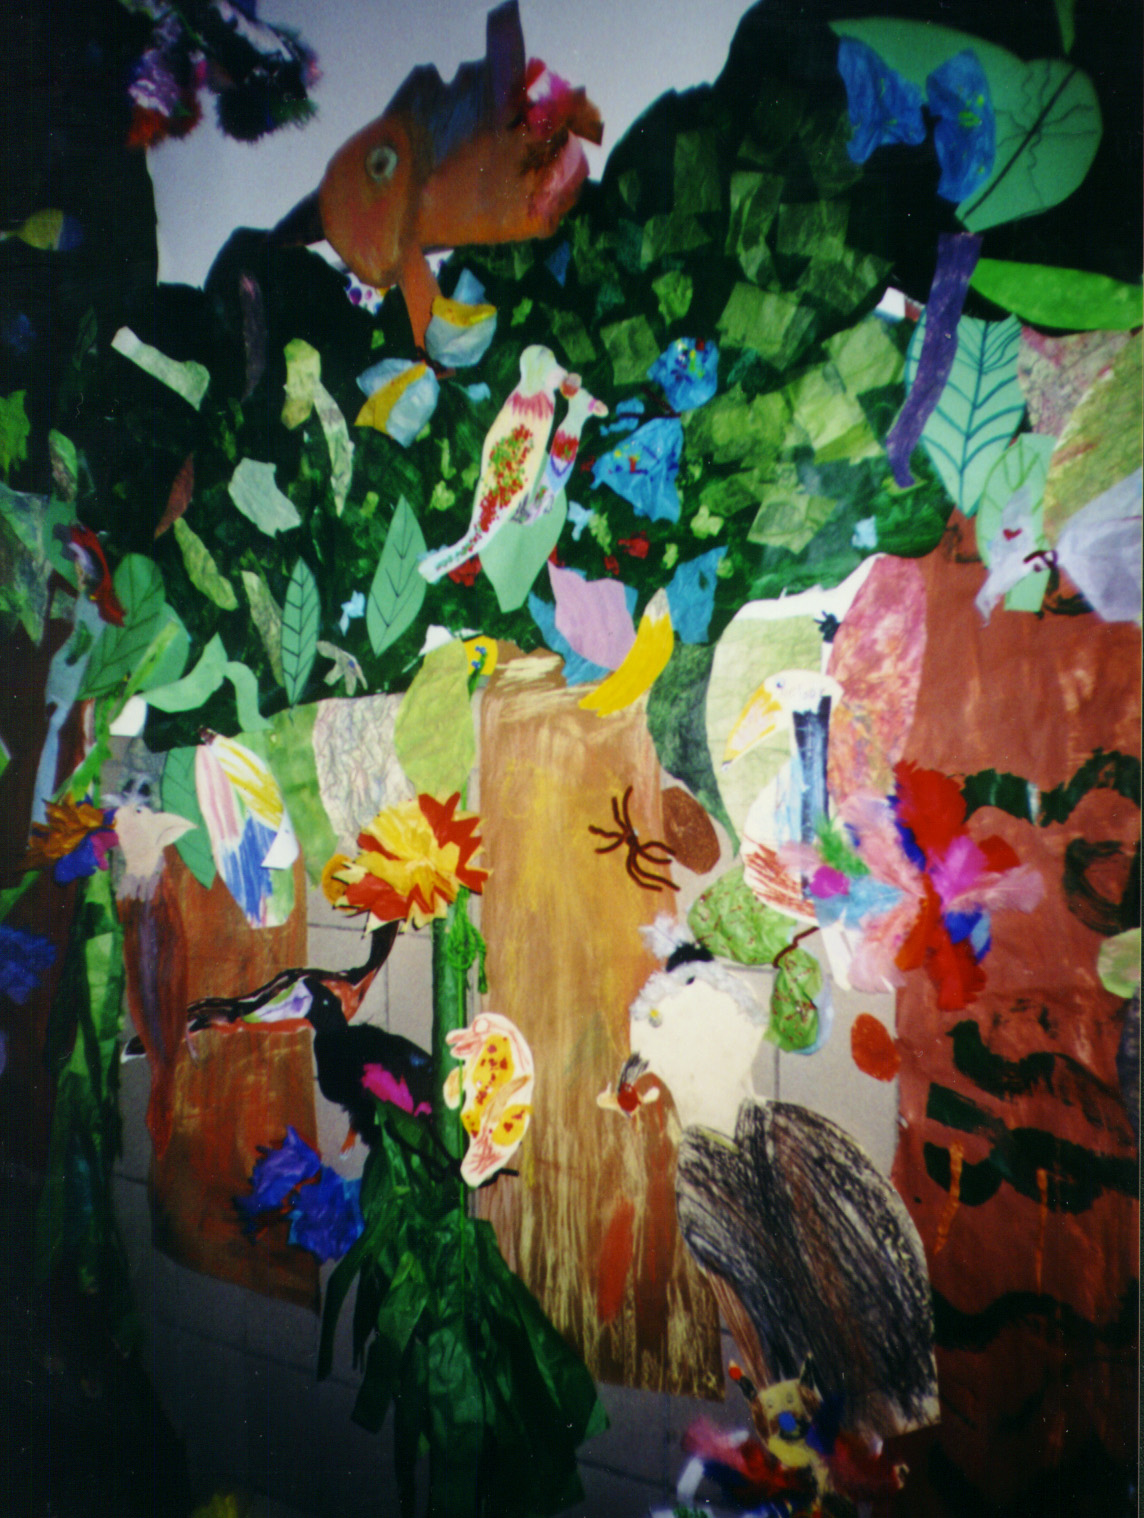
Beautiful
Birds of the P.S. 6 Rainforest
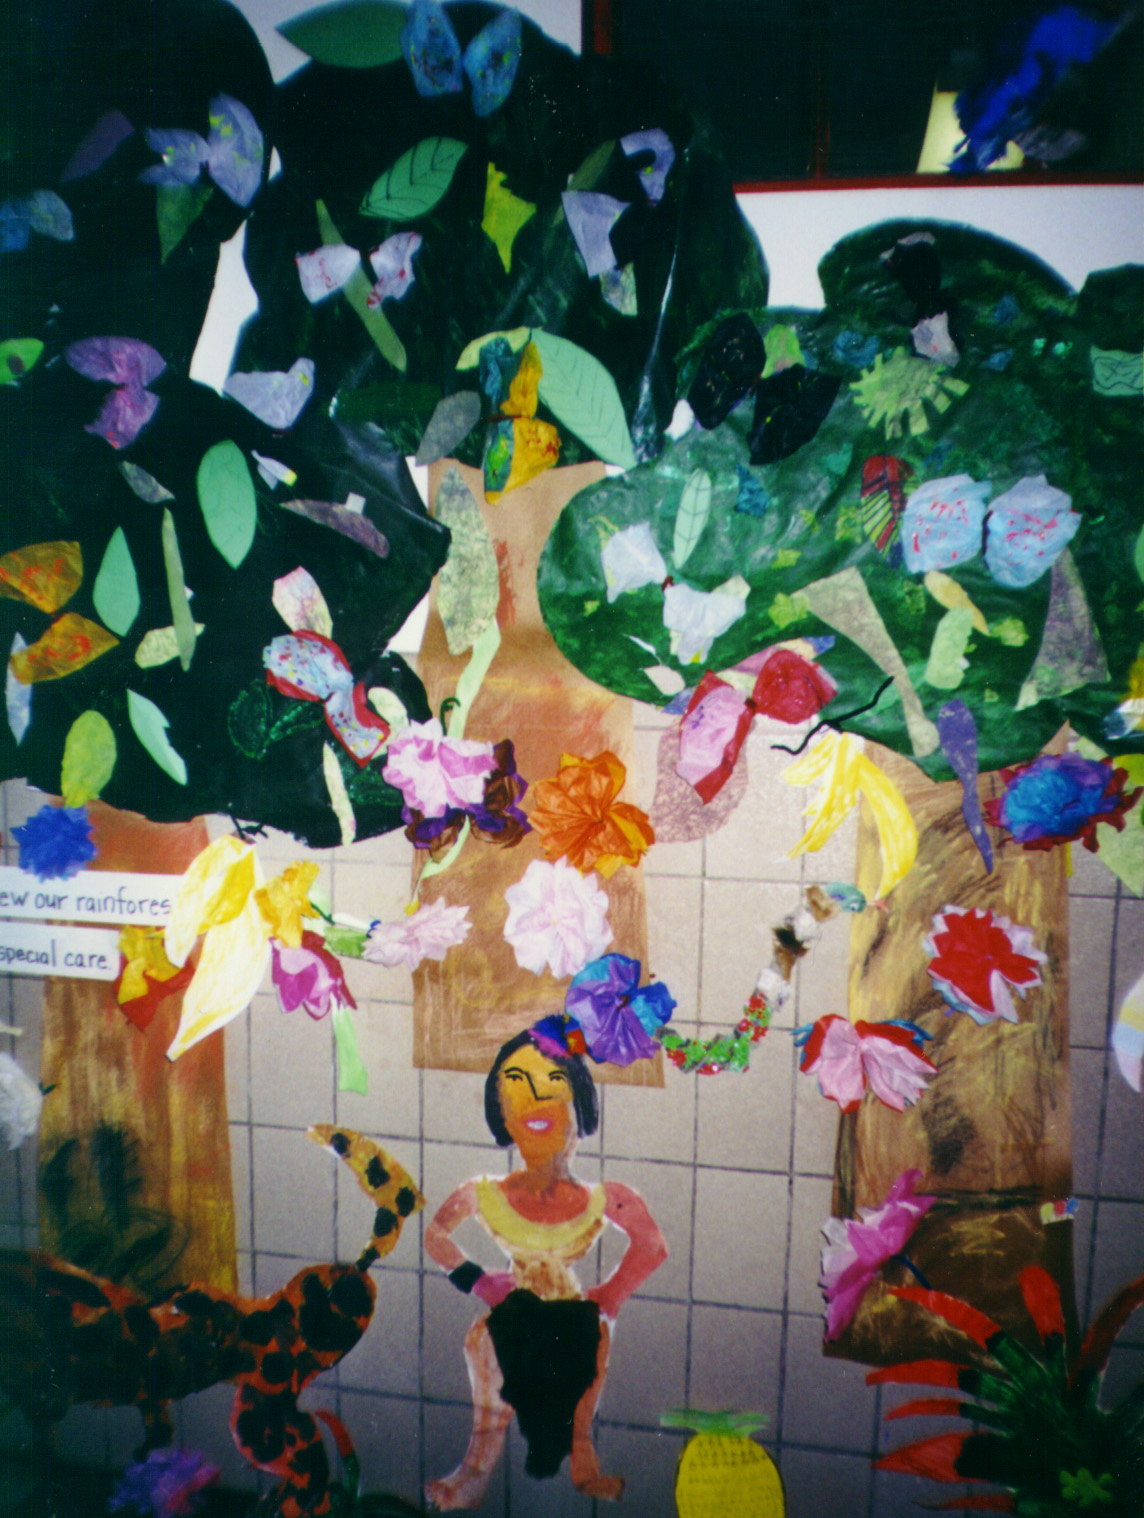
Jaguars,
geckos, and snakes . . . oh my! A walk through the P.S. 6 Rainforest
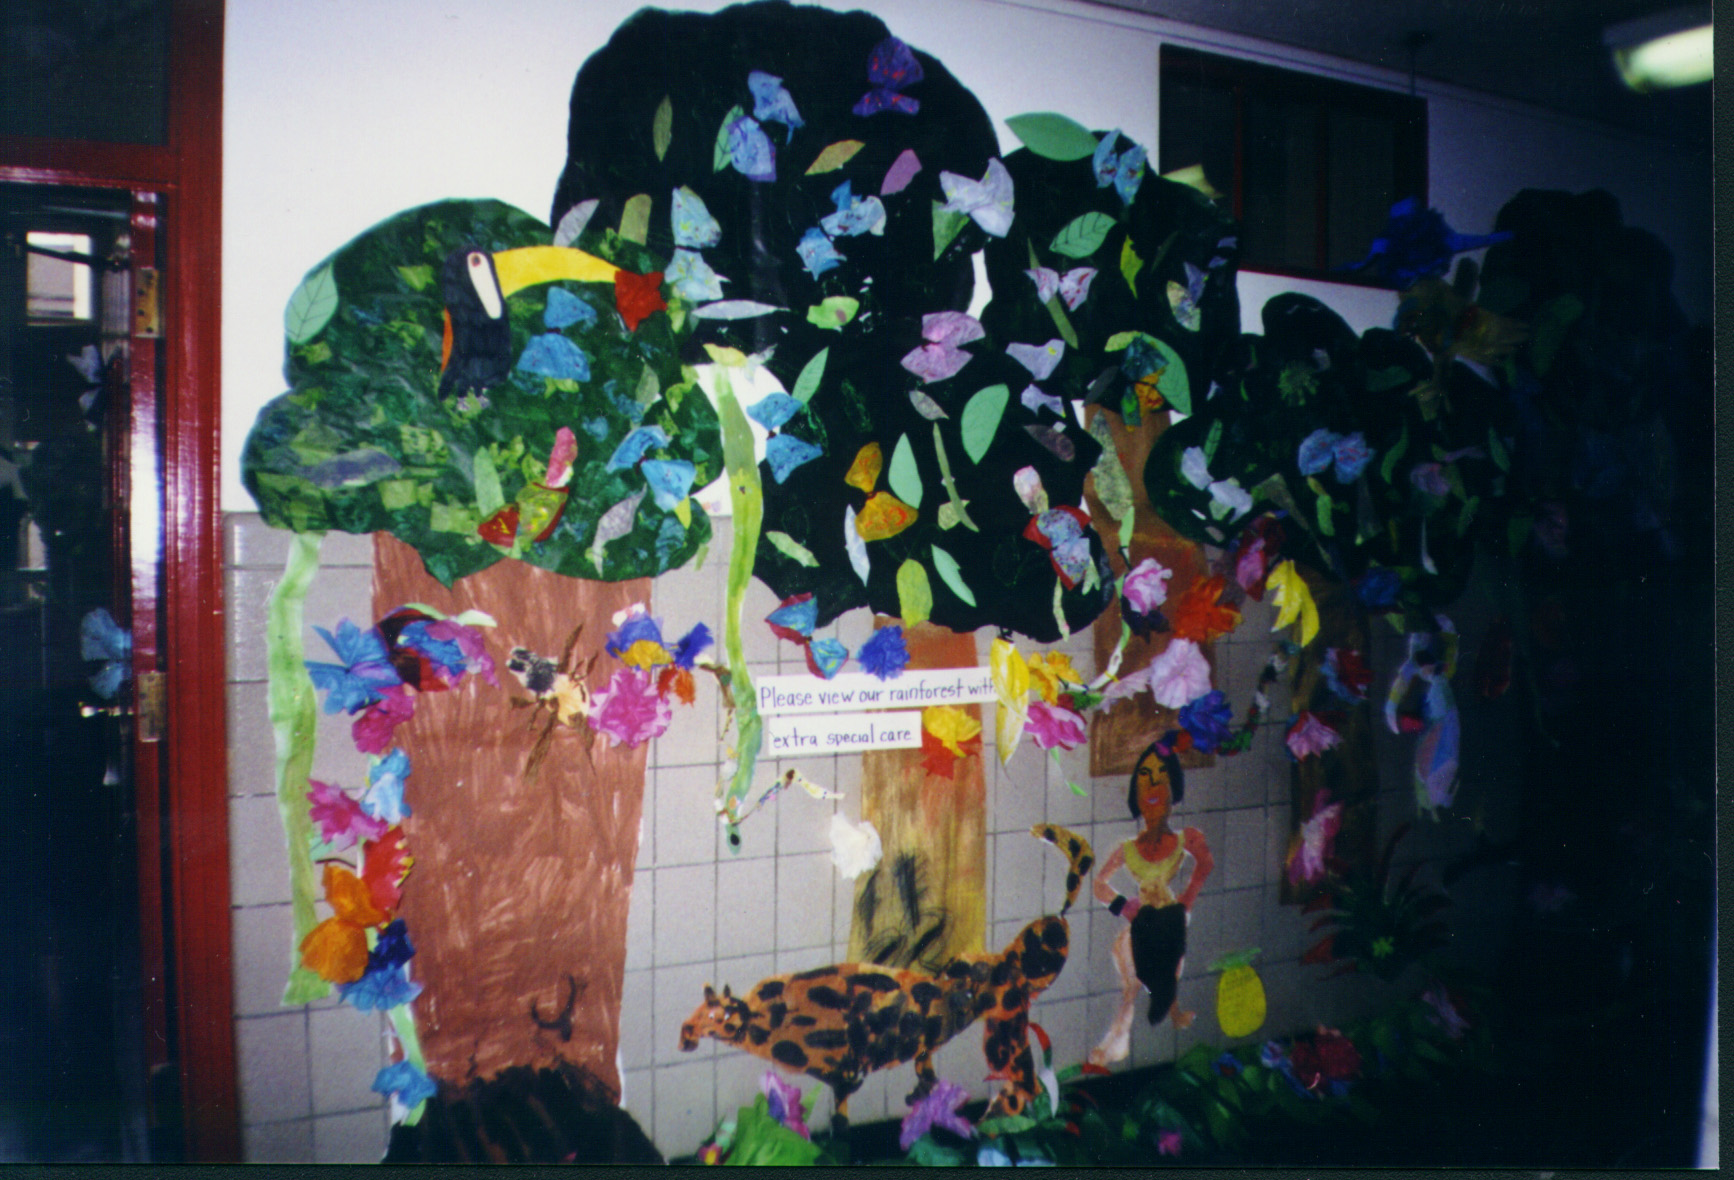
P.S.
6 Rainforest Mural created by 3rd grade students in art class
BIBLIOGRAPHY
|


