

Louis Velez

Technology
Objectives
 |
To teach students the skills needed to do research on the Internet and other computer related materials.
|
|
To introduce students to the concepts of 3D designs.
|
|
To integrate 3D design skills and create a futuristic city using the computer.
|
|
To create multimedia presentations on all the futuristic projects.
|
|
|
TABLE
OF CONTENTS
INTERNET RESEARCH SKILLS
|
CONCEPTS OF 3-D DESIGN
|
CITY PLANNING
|
MULTIMEDIA PRESENTATION
|
HINTS TO TEACHERS
|
ASSESSMENT
|
STUDENT SAMPLES
|
STORYBOARD
|
Objective
1 - INTERNET RESEARCH SKILLS
Lesson
1 (4-5 Sessions)
Teacher
Aim:
To introduce researching strategies on the
Internet, including the use of search engines and advanced search techniques.
Student Aim:
To find specific information on the Internet.
Motivation:
|
Brainstorm the different ways we can
locate information on a given topic without using the a computer.
|
|
Compare
and contrast the benefits and drawbacks of various research methods re their
efficiency and effectiveness.
|
|
List all the sources which students mention on the board.
|
|
Discuss the positive and negative features of each
, comparing and contrasting positive and negative qualities.
|
|
Groups
develop subtopics from the class topic "Futuristic Environments"
(Example: Housing, Transportation, Communication, Education, Sports,
Entertainment, etc.)
|
Development:
1. Motivation.
Using the attached pages or books on the Internet do the following:
3. Introduce search engines... Yahoo, Google,
AltaVista. How is America Online
[AOL] different from these sites? How do we define "search
engine?" Why do we use them? (Elicit: More information; can be more
specific, etc.) See Poser's introduction to the search engine unit posted
on the Teachers Network Internet 10
4. LAB EXPLORATION
Introduce
inquiry-based exploration to practice search strategies on Futuristic topics.
Compare these three sites using your group's subtopic:
a.
How many "hits" were found at each site for your topic?
b.
How are the sites arranged? (Elicit: by popularity, etc.)
c.
Why is it difficult to find information when there are thousands of hits at a
site? (Elicit: time consuming; unrelated info obtained, etc.)
d.
What do we need to do in order to find the information we need for our projects
in an environment that has thousands of references? (Elicit: be more
specific, i.e. narrow the search)
5. Introduce and practice advanced searches:
a.
Use of limiting words "and" "or"
"not"
b.
Reading annotations and web addresses to determine site validity/value.
6.
Groups continue searches.
7.
Which of the three sites is best? Support your group's response building a
case by presenting your findings.
8.
Groups compare findings and present their lab explorations to the
class.
Summary:
How
are the search sites alike/different? Why are search engines preferable to
AOL?
Application:
How
will this strategy help you in other content area schoolwork? (Elicit: Projects,
reports; gives in depth information, etc.)
Homework:
A. Name five (5) careers in which the Internet is used
for research purposes.
B. Write out the sequence of steps you would demonstrate in order to explain it
to a person unfamiliar with the Internet.
 Lesson
2 (3-4 class sessions) - RESEARCH SKILLS
Lesson
2 (3-4 class sessions) - RESEARCH SKILLS
Teacher
Aim:
To introduce research skills using computer
software, including use of: keywords, cross references, hyperlinks, etc. on the
electronic encyclopedia, atlas, and other CD reference software.
Student
Aim:
To find information using computer
software related to science fiction
and other related units in other subject areas.
Motivation:
Without using a computer, how many sources would you need
to find information on Space Travel including pictures and videos
of the ships, and the astronauts.
a. List the different resources for
each part of the Space Travel topic (Elicit: encyclopedia, specialized
encyclopedia, specific electronic books, etc.)
b. How can we most efficiently find the information that we need using these
CDs? (Aim)
Development:
1.
Motivation.
2. Introduce the Encyclopedia CD.
3. Discuss how quick it is to get many types of media from this CD.
4. Introduce the techniques for searching on the
CD software.
"If you needed to find out when the fist space craft was flown for science
class, how would you begin searching?
a. Brainstorm ideas.
b. Write on board. List with class best words to use for this
purpose.
c. What are "keywords?" Why do we use them? How do they
help us? (Elicit: narrow search; main idea identified, etc.)
LAB
EXPLORATIONS
5.
Have students research their groups' specific subtopics how
much information can be gathered and how quickly.
6.
Introduce other reference software and have students practice their searching
skills.
Summary:
What are the advantages of using multimedia software for topics such as space
travel, etc. (Answers vary) How will the use of keywords help us? (Elicit:
main idea; specific; time saver)
Application:
How
will the use of keywords and CD reference software help us in our content area
subjects?
Homework:
Have students make a list of various software that might be useful for their
research in the Futuristics topics.
[OPTIONAL: Students might explore the local software stores, libraries,
and online catalogs for ideas.]
Objective 2
 Lesson
1 (1-2 Sessions) - CONCEPTS OF 3-D DESIGN
Lesson
1 (1-2 Sessions) - CONCEPTS OF 3-D DESIGN
Teacher Aim:
To introduce students to the concepts of 3D designs.
Student Aim:
Why
do 3D designs create a more realistic image?
Motivation:
Show students video clips of
Toy Story, the first computer -animated 3D film, and some still pictures from magazines of 3D creations.
Discuss with students where they might have seen other 3D creations. Make a list on the board.
Development:
1. Motivation
2. Discuss the difference between 2D and 3D.
-2D - Flat object having a length and width
-3D - Object having length, width and depth.
3. Show students sample including objects which they can hold, examine and
better understand the differences.
Have them compare [Hands on activity - in groups]
-an apple/ball and a sheet of paper
-book and a sheet of paper
4. Discuss the advantages of using 3D objects on the computer. Groups share
findings with class. (Elicit : Seeing all sides
- Better feeling or understanding the objects)
LAB
EXPLORATION
5.
Have students research 3D using the Internet or software available in the class
like the Multimedia Encyclopedia.
Summary:
What is the difference between 2D and 3D objects?
How does 3D help us to view images more realistically?
Application:
How
can we use our knowledge of 3D for the creation of a Futuristic City?
Homework: What professions or occupations use 3D modeling?
Lesson
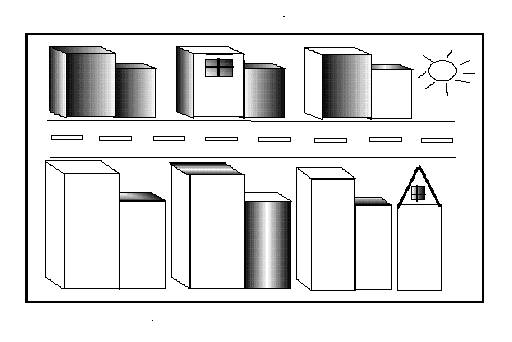
2 (3-4 Sessions) - CREATING 3-D OBJECTS
Teacher Aim:
To introduce students to the skills needed for creating 3D
objects IN ORDER TO DESIGN FUTURISTIC ENVIRONMENTS..
Student Aim:
How
are 3D objects are created using the "drawing" program in AppleWorks
[formerly known as ClarisWorks]?
Motivation:
Have
students draw a cityscape using line drawings from the tool box reviewing
previous learning. Squares and lines only. How can we transpose 2D
to 3D? Aim.
Development:
1. Motivation.
2.
Review homework assignment on the professions and occupations which use 3D modeling. List them on the board. Review the differences between 2D and 3D objects.
3. Have students start a Drawing program ( e.g. ClarisWorks)
4. Demonstrate and have students use the
tools including: lines, boxes, circles, etc..
5. Demonstrate and have students change it from the 2D object to
a cube which is 3D using the teacher's monitor or projection unit in the front
of the room.
STEPS for creating 3D images:
a. Duplicate image (square).
b. Drag and drop diagonally approximately 1/4 inch.
c. Attach 3 lines corner to corner to create the 3D effect, i.e. a cube.
Note: To fill in "shadow effect" follow these steps.
(1.) Select polygon tool from toolbox.
(2.) Trace over lined area to fill.
(3.) Return color palette and select a gray shade.
(4.)The color will fill the selected area.
6. Have students
transpose their original 2D art to the 3D images using the technique
demonstrated.
LAB
EXPLORATION
7. Demonstrate and have students add shading and patterns to objects.
8. Have students create one building.
 Student
3D Work Samples
Student
3D Work Samples
Samples
1 & 2
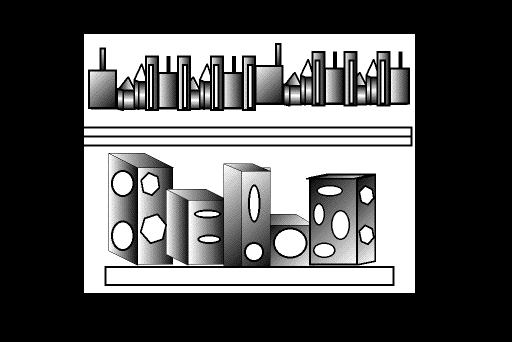
Samples
3 & 4

Samples
5 & 6
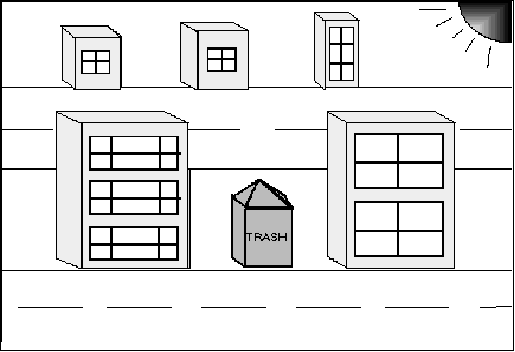
Sample7
Summary:
How were we able to change a 2D object to a 3D object?
Application:
To be used for creation of Futuristic City
Homework:
Using a ruler create a city sidewalk with several buildings.
Show the sidewalk from an angle to demonstrate 3D view.
Objective
3
Lesson
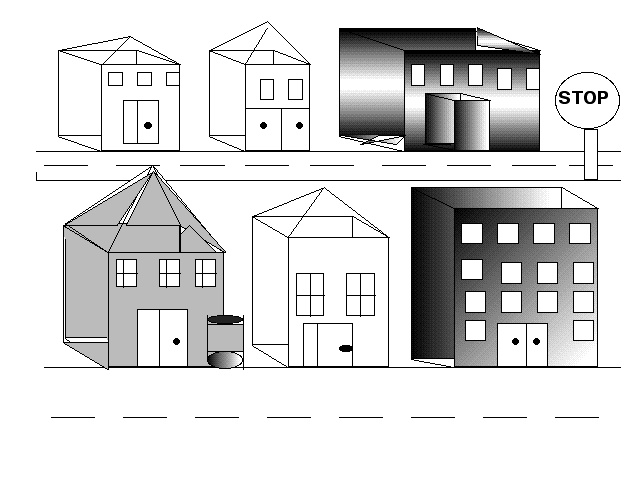
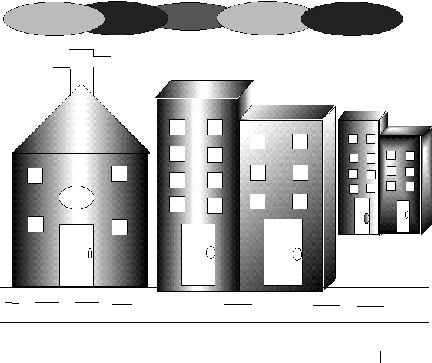
1 (3-4 Sessions) - CITY PLANNING

Teacher Aim:
To introduce students to the skills needed for planning a
3D city using a drawing program.
Student Aim:
To learn how to create a
3D city street.
Motivation:
Have students
post the city street sketches, from their homework assignments, on the board.
Review the tools which might be used in their drawing programs to create
the images shown. Discuss the different types of buildings that are found
in a cityscape.
How
are city streets different from our school neighborhood in appearance?
Elicit: skyscrapers; size; shape, etc.
How
will the drawing program help us to visualize future cityscapes? (Elicit:
Realistic, etc.)
Development:
1. Motivation.
2. Have students create a cityscape elaborating on previous learning from
preceding lessons (see above). Include:
a. -a few store fronts, with signs
b. -an apartment building
c. -street lights and any extras.
3. Students save work on their diskettes.
4. Students print out their designs.
5. Student share their individual designs with members of the group and critique them
pointing to positive qualities, also making suggestions for improving
the designs, if needed. Peer groups share with class during debriefing.
LAB
EXPLORATION
Teacher
reviews 3D creation process in demonstration on monitor from previous lesson.
Students expand their cityscapes to render 3D views of their projects.
6.
Students create 3D versions of their cityscapes.
7. Students save and print.
8.
Groups share and discuss experiences and critique 3D versions. Class
Sharing/Debriefing follows.
Summary:
How
are the original 2D and final 3D drawings similar? different? What tools
in the drawing program are useful in designing the cityscape? (Elicit:
toolbox, color palette, shadow effect.)
Application:
How
does 3D drawing help to create realistic images of future cities? How do
architects, environmentalists, city planners and others use these drawings?
Homework:
Sketch a
Futuristic Business District.
Lesson
2 (3-4 Sessions)
DESIGNING THE FUTURISTIC CITY

Teacher Aim:
To
challenge students to create/design a Futuristic City by using Sim
City 3000 to meet the needs of the population in the next millennium.
Note:
Sim City 3000 is a simulation game that allows players to create, design
and modify future environments, while including problem solving and critical
thinking challenges)
Student Aim:
Offer
the challenge.
To prepare for the designing of a Futuristic City,
students are asked to brainstorm a list of the population's basic needs, future
inventions/conveniences, environmental and other problems, etc. that may be
associated with their predictions. Groups share with class members.
(Elicit ideas from each of the following categories: transportation,
entertainment, living space, energy, food, medicine, education).
Motivation:
Discuss with students the steps taken in planning a city.
What kind of research is done? What are the needs? What will the
population be? Will we be living on the land, in the air or undersea?
Development:
1. Motivation. Challenge.
2.
Students share (previous night's assignments) their Futuristic Business District
sketches.
3. Students critique their own drawings, recognizing the needs previously
brainstormed by the class (using the information discussed).
4. Students write changes they would make to their plans in their
technology journals; notations on drawings, etc. Later, students meet in groups
to negotiate their plans.
5. Students recreate their plans on the computer using the drawing program
or other software.. e.g. SimCity
3000
LAB
EXPLORATION
6. Students group to work on different sections of a Futuristic City
Each group will be responsible for their own community.
Students will divide the planning.
-someone will work on a Business District
-someone will work on a Living Environment,
-someone will work on an Educational Environment, etc.
7.
Group members meet to synthesize and modify their plans, create their cities.
8.
Groups share during debriefings; share completed projects.
Summary:
What are the keys in planning a Futuristic City?
(Elicit: Population needs including: transportation, energy, food sources,
living space, medical, educational and other)
Application:
Why
is it important for futurists
to actively project the future needs of populations? Why is it important
for them too design cities with the future in mind? How would futuristic
planning help us?
Homework:
Have students sketch their
specific sections of their Futuristic Cities
Objective
4 
Lesson
1 (3-4 Sessions) - MULTIMEDIA PRESENTATIONS
Teacher Aim:
To introduce the skills for preparing multimedia presentations
to share the future cities projects with other classes, teachers, and groups.
Student Aim:
To learn how to create a multimedia presentation
using HyperStudio software
Motivation:
Have students use digital camera, regular camera or camcorder to finish
photographing the projects
- Futuristic City
- Student projects from other subject areas
Have students collect all photos, videos and any documentation from their
classes. Have students scan pictures.
Development:
1. Motivation
2. Demonstrate and introduce HyperStudio to students
3. Introduce
-creating pages, action and popup buttons
-adding text and text boxes, graphics, sound, videos
-recording voices
4. Have students create a sample project to practice all the different tools
5. Introduce storyboarding
6. Group students on different parts of the final presentation
Summary:
What are the different visual and audio samples that can be used in a multimedia presentation?
Application:
To document via a multimedia presentation the Futures Project
Homework:
Students
create a plan using a storyboard for a specific part of the multimedia presentation.
Lesson 2 (8-10 Sessions)
Teacher Aim:
To guide students through the creation of a multimedia presentation of the Futures Project.
Student
Aim:
To integrate documentation of Futures Projects into a multimedia
presentation using digital photography and storyboarding.
Motivation:
How
can we best share our finished Sim City 3000 projects with others? How can
we incorporate all the steps you took in the process of the creation of this
project in an artifact for your portfolio? Aim.
Development:
1. Motivation.
2.
Introduce digital camera, regular camera, and camcorder reviewing specific use
of each and operating techniques. How might these help you to capture the
process? (Elicit: Photography captures images, etc.)
3.
Review HyperStudio (Program previously learned). How this program help us
with our presentations? (Elicit: create slide shows, movement between themes,
photos can be added, etc.)
4.
Student groups create and post their storyboards showing the sequence of
information they will need to portray in order to capture the process.
5.
Student groups present their storyboards to the class for evaluation and
suggestions to ensure clear presentations.
LAB
EXPLORATIONS
6.
Students begin work on their presentations in groups. Advise groups to
determine who will play specific roles in order to organize and efficiently
complete the project proposed, including: scribe, Internet researcher, narrator,
scriptwriter, technician, etc.
7. Encourage students to share ideas and seek help.
8. Give individual help while walking around room.
9. Have students complete their parts of presentation
and share with group to synthesize material.
DEMONSTRATION
10. Demonstrate how
to synthesize their respective parts modeling the process on the teacher
monitor.
LAB
EXPLORATIONS 2
11.
Student groups synthesize/ join all the parts to create the whole.
12.
Groups test and troubleshoot any problems.
13.
Students self-evaluate, making any suggestions for improving their presentations.
14.
Student groups present their projects to the class and others.
Summary:
What are the important considerations in creating a multimedia
presentation? How do visual and audio samples enhance the
presentation? How does HyperStudio software help us to present our
projects more effectively?
Application:
How
does HyperStudio software help us to present our projects more effectively?
Homework:
Students
self-evaluate their projects in their technology journals.
HINTS FOR THE TEACHER
|
Become familiar with search engines. It is recommended that
commercial-free search engines are utilized, such as, GOOGLE
or YAHOOLIGANS.
|
|
Collaborate with interdisciplinary faculty to develop curricula that is
meaningful for the students.
|
|
Celebrate your students' accomplishments by publishing their work on the
school website.
|
|
Follow school and district policy regarding permissions for Internet use
and posting of student work and/or photos.
|
UNIT ASSESSMENTS
Student Portfolio
Checklist
|
Student
Self-Evaluation
|
Technology
Journal Rubric
|
The Student Portfolio
Checklist
THE PROCESS
|
Student Journal
|
_____Documentation of the search process
_____Documentation of findings
_____Notes taken from research data
_____Personal notes on the project experience
THE PRODUCT
|
Artifacts
|
_____Storyboards
_____Digital Photographs
_____3D Projects
Student Self Assessment
Name ___________________________________ Date
____________________________
I planned to accomplish the following during this unit:
What new knowledge and skills did I learn?
a. New skills I learned about using
technology:
b. New knowledge I obtained concerning the living in the
future:
c. New possibilities about careers of the future:
d. Other ideas:
How can I use the information I learned in this unit in other subjects?
Technology
Journal Rubric
Score
4 Points:
| Includes
daily entries regarding the project. |
| Details
personal progress, including all difficulties and accomplishments. |
| Documents
the entire step-by-step process. |
Score
3 Points:
| Includes
most daily entries regarding the project. |
| Details
some personal experiences with problems and/or accomplishments experienced
during the process. |
| Documents
the step-by-step process often. |
Score
2 Points:
| Includes
some entries regarding the project. |
| Details
few personal experiences with problems and/or accomplishments experienced
during the process. |
| Seldom
documents the step-by-step process. |
Score
1 Point:
| Few
entries recorded regarding the project. |
| Incomplete
documentation of step-by-step process. |